Minecraft version
Back to mods 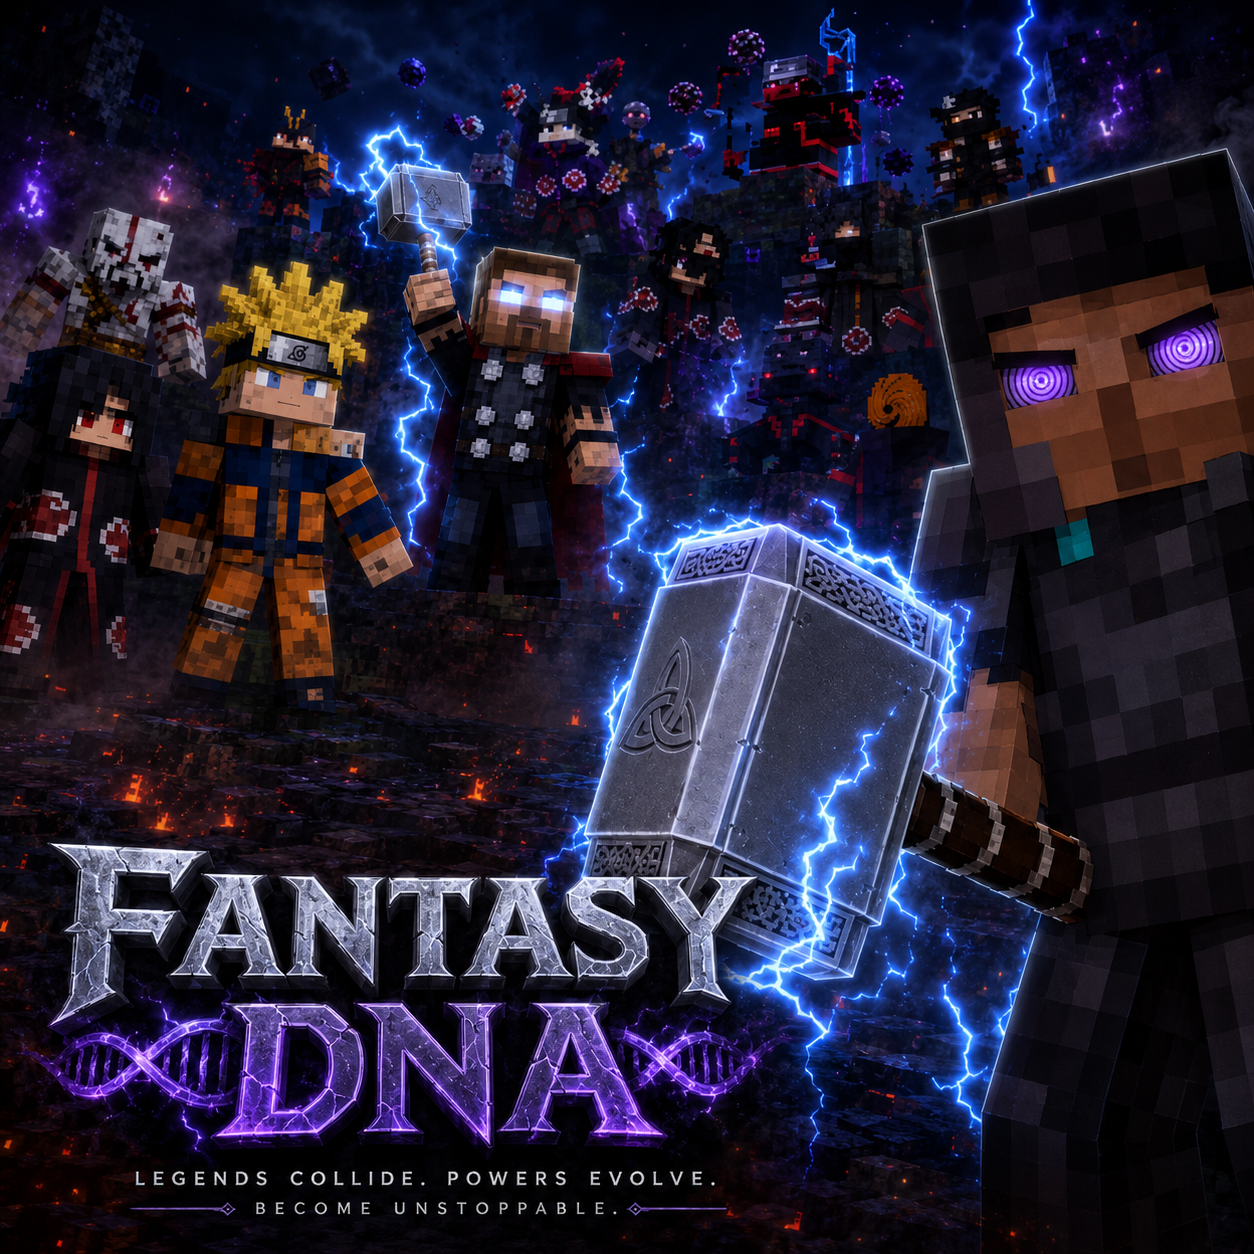
CurseForge · Minecraft mod
Fantasy DNA
Our mod is based off of the fantasy universe; Naruto, Marvel and God of War ETX
Choose a version Pick your version below, then grab the matching file.
Quick answer
Which Fantasy DNA release should I use?
Latest stable file fantasydna-1.21.1-1.1.2.jar
Game version 1.21.1
Loader Forge
Fantasy DNA fantasydna-1.21.1-1.1.2.jar targets 1.21.1 with Forge. The project page does not say whether this file belongs on the client, dedicated server, or both. No extra mods listed for this file.
Where it goes
Is Fantasy DNA required on the client, server, or both?
The project page does not say whether this file belongs on the client, dedicated server, or both.
Client Source doesn’t say
Dedicated server Source doesn’t say
Loader for this release Forge
Required install it here Optional supported, not mandatory Not supported do not install here Source doesn’t say do not assume
The source does not explicitly classify this release as client-only or server-only.
What else does Fantasy DNA fantasydna-1.21.1-1.1.2.jar need?
fantasydna-1.21.1-1.1.2.jar. Change the file and its required mods may change too.
This file does not list any required mods. Do not add a library just because a different file uses it.
This file does not list any required or optional mods.
Before you install it
Add Fantasy DNA without breaking your instance.
Built for Fantasy DNA fantasydna-1.21.1-1.1.2.jar. Pick another file and the loader, install side or required mods may change.
- 01
Stick to this file
Use fantasydna-1.21.1-1.1.2.jar. It targets 1.21.1 with Forge; another release may have different loader, side or dependency requirements.
- 02
Bring the mods it needs
This file does not list any required mods. Do not add a library just because a different file uses it.
- 03
Put it on the correct side
The project page does not say whether this file belongs on the client, dedicated server, or both.
- 04
Pick the file you checked
Use the “Get this file” button beside fantasydna-1.21.1-1.1.2.jar. It opens that exact file at the source.
About this project
What does Fantasy DNA add?
Fantasy DNA
Build your own legend. Choose your DNA. Master your powers.
Fantasy DNA is a progression-focused Minecraft mod built around the idea of combining different power systems into one character. Instead of following a single class or fixed build, you can develop multiple DNA paths, unlock new abilities, evolve powerful eyes, hunt legendary creatures, collect unique weapons, and create a playstyle that actually feels like your own.
Whether you want to play as an Uchiha, master the Byakugan, become a Jinchuriki, follow the divine path, use Witcher signs, experiment with mutant abilities, or mix completely different powers together, Fantasy DNA lets you build your character your way.
⚡ Build Your Own Power Path
Fantasy DNA currently features 8 different DNA paths, each with its own progression, rank system, abilities and identity:
God (Divine) — divine and pantheon-based powers
Uchiha — Sharingan, Katon and Susanoo
Hyuga — Byakugan, Juken and Tenseigan
Chinoike — Ketsurgiyan and blood-based abilities
Mutant — speed, webs, shapeshifting and size manipulation
Witcher — Witcher signs and special vision
Paladin — healing, protection and holy abilities
Wizard — elemental magic, teleportation and arcane powers
You can combine up to 3 DNA traits on the same character, allowing builds such as Uchiha + Mutant + Witcher or completely different combinations.
And progression is independent. Every DNA has its own rank and XP, so improving one path does not automatically turn every other path into the same level.
👁️ A Real Dojutsu System
Eyes are more than cosmetic upgrades.
Fantasy DNA introduces a dedicated eye system where your equipped eyes actually determine which dojutsu abilities you can use. Left and right eye slots are handled independently, and advanced eyes can be developed through the Eye Machine.
Progress through:
Sharingan → 2 Tomoe → 3 Tomoe → Mangekyō → EMS
and discover higher-level eyes such as:
Rinnegan, Rinne-Tomoe, Rinne Sharingan, Byakugan, Tenseigan, Ketsurgiyan and more.
Mangekyō is not simply handed to you by leveling up either. Its awakening is tied to an actual in-game event, making powerful eye progression feel much more meaningful.
📜 Discover Your Abilities
Fantasy DNA is built around progression instead of instantly giving you an entire ability kit.
New characters receive only a limited starting selection, while many stronger abilities must be discovered and unlocked through Ability Seals found throughout the world.
You can also use Skill Upgrade Scrolls to improve abilities you already own by enhancing their level, cooldowns or mana efficiency.
This means your character is not finished the moment you drink a potion. Your build grows as you play.
🌀 Summons, Transformations & Giant Forms
Power in Fantasy DNA is not limited to normal abilities.
You can unlock and use systems such as:
Kuchiyose Summons
Summon creatures such as toads, snakes, hawks, slugs and Wood Golems.
Susanoo
Progress through 5 different forms, with later forms gaining flight and the ability to be ridden and controlled.
Jinchuriki
Use chakra cloak forms or enter full Bijuu transformations as your progression advances.
Gedo Mazo
Use the statue as part of the larger Tailed Beast progression system.
Shinsu Senju
Ride and control this massive form while dealing huge area damage.
🐉 Hunt the Tailed Beasts
The world of Fantasy DNA is meant to be explored.
The 9 Tailed Beasts can be found in distant regions of the world and are designed around an actual hunting experience rather than simply appearing next to you.
Track them down, find their territory, defeat and seal them, and continue your progression toward the ultimate Tailed Beast path.
The system currently includes:
Shukaku · Matatabi · Isobu · Son Gokū · Kokuō · Saiken · Chōmei · Gyūki · Kurama
Collecting all nine also opens the path toward the Ten-Tails (Juubi) through Gedo Mazo.
🌑 Shadow Clones & Limbo
Shadow Clones are designed to feel like actual copies of your character.
They can inherit your appearance, eyes, eye frames and even the visual state of your powers. Their combat behavior also reflects the weapon you are using.
Shadow Clone progression can eventually reach 10 clones, while Limbo has its own eye-based system that determines how many Limbo clones you can maintain.
That means your eye build can directly affect how your Limbo system works.
🔥 Fight Powerful Enemies
Fantasy DNA brings together a wide range of boss encounters, with 15 current major bosses including characters and legends such as:
Naruto, Minato, Tobirama, Sasuke, Itachi, Obito, Madara, Pain, Neji, Kisame, Orochimaru, Thor, Kratos, Poseidon and Zabuza.
Bosses can reward you with rare eyes, Ability Seals and legendary weapons, giving you a reason to keep exploring and fighting stronger enemies.
Some encounters even have unique mechanics instead of simply being stronger versions of normal mobs.
⚔️ Legendary Weapons
Fantasy DNA also features a collection of special weapons with unique mechanics and combat behavior.
Among them are:
Mjolnir
Stormbreaker
Leviathan Axe
Draupnir Spear
Poseidon's Spear
Blade of Chaos
Gunbai
Kubikiribōchō
Many weapons are bound to their user and can be recalled, while others have special combat stances, ranged attacks, defensive mechanics or unique abilities.
Mjolnir also includes dedicated recall and flight controls, while weapons such as Poseidon's Spear and Blade of Chaos feature special spinning mechanics for defensive and offensive play.
🏯 Explore Konoha & Asgard
Fantasy DNA is not only about combat.
The mod includes dedicated destinations such as Konoha and Asgard, each with their own environment, NPCs and boss content.
Both can be reached through custom portal systems using their own materials, frames and igniters.
This gives you another reason to explore, gather resources and progress beyond your starting area.
⛏️ New Resources & Crafting
Build your progression through new materials and crafting systems including:
Silver
Steel
Asgardium
You can mine, process and transform these materials into weapons, blocks, special stations and progression-related structures.
The mod also adds special crafting stations, energy systems, seals, runes and Bifrost-related materials to support the larger progression loop.
🎮 Designed Around Your Playstyle
Fantasy DNA is meant to feel flexible.
You can focus on one DNA and specialize heavily, combine different DNA paths for hybrid builds, build around specific dojutsu, become a weapon-focused fighter, rely on summons and transformations, or chase some of the strongest powers in the mod.
There is no single "correct" build.
Your DNA. Your powers. Your choices.
Whether you're here for Naruto-inspired progression, divine weapons, huge transformations, boss fights, exploration, or simply creating an absurdly powerful hybrid character, Fantasy DNA is built to give you something new to work toward.
**Choose your DNA.
Awaken your power.
Build your legend.
Requirements Minecraft 1.20.1 Forge 47.4.20 or newer in the Forge 47 line GeckoLib 4.8.4 or newer, below GeckoLib 5
Project description from CurseForge.
Pick your setup
Fantasy DNA by Minecraft version and loader
Choose the version and loader you play, then open the matching release.
Minecraft version
1.20.1
1 loader buildCheck the dependencies, then try the file in a copied instance before changing a world you care about.
Recent files
Fantasy DNA versions and loaders
fantasydna-1.21.1-1.1.2.jar
16 Sept 2026
Client Source doesn’t say Server Source doesn’t say Dependencies No extras listed Listed on Release listing
Check the 1.21.1 · Forge setup Forge1.21.1 release
fantasydna-1.20.1-1.1.2.jar
15 Sept 2026
Client Source doesn’t say Server Source doesn’t say Dependencies No extras listed Listed on Release listing
Check the 1.20.1 · Forge setup 1.20.1Forge release
fantasydna-1.21.1-1.1.1.jar
13 Sept 2026
Client Source doesn’t say Server Source doesn’t say Dependencies No extras listed Listed on Release listing
Check the 1.21.1 · Forge setup Forge1.21.1 release
fantasydna-1.20.1-1.1.1.jar
13 Sept 2026
Client Source doesn’t say Server Source doesn’t say Dependencies No extras listed Listed on Release listing
Check the 1.20.1 · Forge setup 1.20.1Forge release
fantasydna-1.20.1-1.1.0.jar
31 Aug 2026
Client Source doesn’t say Server Source doesn’t say Dependencies No extras listed Listed on Release listing
Check the 1.20.1 · Forge setup 1.20.1Forge release
fantasydna-1.21.1-1.1.0.jar
31 Aug 2026
Client Source doesn’t say Server Source doesn’t say Dependencies No extras listed Listed on Release listing
Check the 1.21.1 · Forge setup Forge1.21.1 release
fantasydna-1.20.1-1.0.9.jar
20 Aug 2026
Client Source doesn’t say Server Source doesn’t say Dependencies No extras listed Listed on Release listing
Check the 1.20.1 · Forge setup 1.20.1Forge release
fantasydna-1.20.1-1.0.8.jar
8 Aug 2026
Client Source doesn’t say Server Source doesn’t say Dependencies No extras listed Listed on Release listing
Check the 1.20.1 · Forge setup 1.20.1Forge release
fantasydna-1.20.1-1.0.7.jar
2 Aug 2026
Client Source doesn’t say Server Source doesn’t say Dependencies No extras listed Listed on Release listing
Check the 1.20.1 · Forge setup 1.20.1Forge release
fantasydna-1.20.1-1.0.6.jar
31 Jul 2026
Client Source doesn’t say Server Source doesn’t say Dependencies No extras listed Listed on Release listing
Check the 1.20.1 · Forge setup 1.20.1Forge release
fantasydna-1.20.1-1.0.5.jar
29 Jul 2026
Client Source doesn’t say Server Source doesn’t say Dependencies No extras listed Listed on Release listing
Check the 1.20.1 · Forge setup 1.20.1Forge release
fantasydna-1.20.1-1.0.4.jar
26 Jul 2026
Client Source doesn’t say Server Source doesn’t say Dependencies No extras listed Listed on Release listing
Check the 1.20.1 · Forge setup 1.20.1Forge release
Looking for an older file? The official CurseForge project page is in Resources.
 mod
mod CurseForge · Minecraft
Zzombies (Pvz)
Plants vs. Zombies, PvZ, zombis, Minecraft
 mod
mod CurseForge · Minecraft
iChun Gravity Gun Mod Revival
iChun Gravity Gun revival is a port of iChun's original Gravity Gun mod from version 1.12.2 for modern versions (optional colored gravity guns for playing paintball with Paintball Revival Mod if you have it installed).
 mod
mod CurseForge · Minecraft
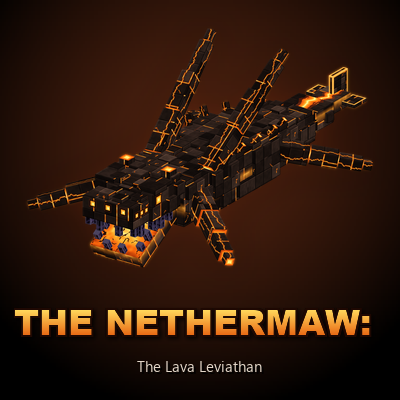
The Nethermaw
The Nether has oceans of fire that few things dare cross. Yet something more ancient than the fortresses tears through the lava: a colossal basalt leviathan. Ride its back from shore to shore, but when its spines start to smoke, get off before it dives.