Minecraft version
Back to mods 
CurseForge · Minecraft mod
Storage Screen
A centralized storage terminal that lets you view, organize, store, withdraw, and craft items from all connected chests, barrels, and inventories without any internal storage.
Choose a version Pick your version below, then grab the matching file.
Quick answer
Which Storage Screen release should I use?
beta file StorageScreen-1.21.1-Neoforge-1.0.0.jar
Game version 1.21.11
Loader NeoForge
Storage Screen StorageScreen-1.21.1-Neoforge-1.0.0.jar targets 1.21.11 with NeoForge. The project page does not say whether this file belongs on the client, dedicated server, or both. No extra mods listed for this file.
Where it goes
Is Storage Screen required on the client, server, or both?
The project page does not say whether this file belongs on the client, dedicated server, or both.
Client Source doesn’t say
Dedicated server Source doesn’t say
Loader for this release NeoForge
Required install it here Optional supported, not mandatory Not supported do not install here Source doesn’t say do not assume
The source does not explicitly classify this release as client-only or server-only.
What else does Storage Screen StorageScreen-1.21.1-Neoforge-1.0.0.jar need?
StorageScreen-1.21.1-Neoforge-1.0.0.jar. Change the file and its required mods may change too.
This file does not list any required mods. Do not add a library just because a different file uses it.
This file does not list any required or optional mods.
Before you install it
Add Storage Screen without breaking your instance.
Built for Storage Screen StorageScreen-1.21.1-Neoforge-1.0.0.jar. Pick another file and the loader, install side or required mods may change.
- 01
Stick to this file
Use StorageScreen-1.21.1-Neoforge-1.0.0.jar. It targets 1.21.11 with NeoForge; another release may have different loader, side or dependency requirements.
- 02
Bring the mods it needs
This file does not list any required mods. Do not add a library just because a different file uses it.
- 03
Put it on the correct side
The project page does not say whether this file belongs on the client, dedicated server, or both.
- 04
Pick the file you checked
Use the “Get this file” button beside StorageScreen-1.21.1-Neoforge-1.0.0.jar. It opens that exact file at the source.
About this project
What does Storage Screen add?
Storage Screen
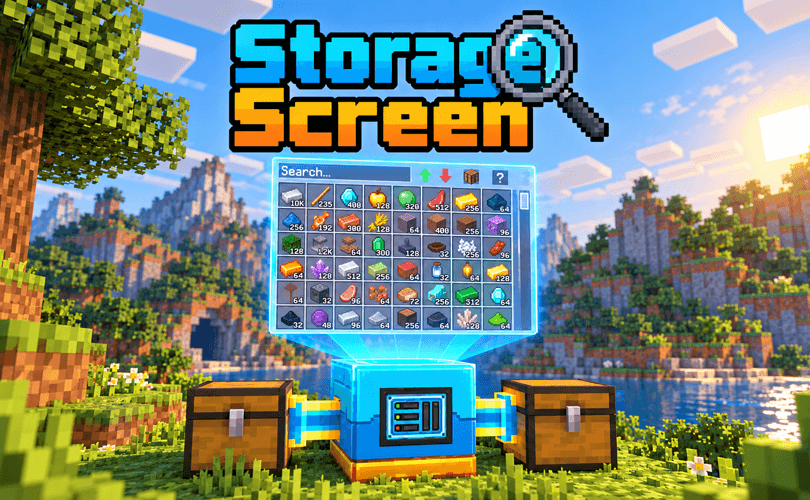
The Storage Screen is a centralized system for viewing, organizing, storing, withdrawing, and crafting items using the inventories connected to the network. Unlike systems that use disks or digital cards, the Storage Screen has no internal storage. Items remain physically stored in chests, barrels, drawers, boxes, and other storage blocks connected to the network.
Compatibility with other mods
The system was designed to work with Minecraft inventories and also with storage blocks added by other mods, as long as they use the item system compatible with NeoForge. Blocks that may work include: Chests and double chests, Barrels, Storage boxes, Drawers, Cabinets, Machines that have an item inventory, Storages that allow more than 64 items per slot, Other blocks that provide a compatible inventory. The network can also use the mod’s own Storage Cable or item transfer cables from other mods, such as conduits, tubes, pipes, ducts, connectors, and compatible transporters. Compatibility depends on the other mod exposing its cables and inventories through the systems recognized by NeoForge.
Language support
Portuguese (Brazil)
English
Russian
Spanish
Setting up a network
Place the Storage Terminal in the desired position.
Connect the Storage Cable or a compatible item transfer cable from another mod to the back of the Terminal.
Run the cables to the chests, barrels, boxes, drawers, machines, or other storage blocks.
You can create branches in the cables to connect several different storages to the same network.
Right-click the Storage Terminal to open the interface.
The Terminal searches for inventories starting from its back side and follows the connected cables and storages. The network can check up to 512 connected blocks
Items are not teleported into the Terminal. They remain stored in their original blocks and are accessed through the interface.
Storage Terminal interface
The interface groups identical items from different inventories and displays them as a single total. For example, if there are 32 iron ingots in one chest and 64 in another, the Terminal will show a single icon with a total of 96 iron ingots.
Search
Use the top bar to search for an item by name. The search uses the language selected in Minecraft. Item names change automatically according to the language chosen by the player.
Item organization
The green arrow sorts from highest to lowest quantity.
The red arrow sorts from lowest to highest quantity.
The side bar allows you to navigate when there are more items than the screen can display.
Quantities appear over the icons in a compact format to make them easier to read.
Withdrawing items
Left-click an item: withdraws up to a full stack.
Right-click: withdraws only one unit.
Shift + click: sends the stack directly to the player’s inventory.
Even if the network has thousands of units, each withdrawal respects the maximum stack size of that item.
Storing items
Pick up an item with the cursor and click inside the storage area:
Left-click: tries to store the entire held stack.
Right-click: stores only one unit.
The Storage Terminal automatically looks for space in the connected inventories. If there isn’t enough space, the remaining items stay with the player.
You can also use compatible cables and automation systems to insert or extract items directly from the connected chests. Changes appear automatically in the Terminal.
Information panel
Click the ? button to view:
Total quantity of stored items
Number of filled or used slots
Number of empty slots
Remaining available space in the network
The calculation takes into account the real capacity of each inventory. If a storage from another mod allows more than 64 items in a single slot, that extra capacity is also considered.
Integrated crafting
Click the button with the crafting table to open the 3×3 crafting grid. You can place the ingredients manually or use the JEI integration:
Open the desired recipe in JEI.
Click the + button on the recipe.
The Terminal searches for the ingredients in the connected storages.
The found items are taken from the network and placed automatically in the grid.
Withdraw the result normally.
After crafting, the Terminal tries to refill the ingredients to repeat the same recipe.
Click the X to clear the recipe and return the ingredients to the network.
If the interface is closed with ingredients in the grid, the Terminal tries to return them to the storages. If there isn’t enough space, they are returned to the player’s inventory.
Project description from CurseForge.
Pick your setup
Storage Screen by Minecraft version and loader
Choose the version and loader you play, then open the matching release.
Check the dependencies, then try the file in a copied instance before changing a world you care about.
Recent files
Storage Screen versions and loaders
StorageScreen-1.21.1-Neoforge-1.0.0.jar
23 Oct 2026
Client Source doesn’t say Server Source doesn’t say Dependencies No extras listed Listed on Release listing
Check the 1.21.11 · NeoForge setup NeoForge1.21.11 beta
Looking for an older file? The official CurseForge project page is in Resources.
 mod
CurseForge + Modrinth · Minecraft
Aquaculture 2
Spices up fishing with a number of new biome specific fish, recipes, and more!
 mod
Modrinth · Minecraft
Ultimate Mob Farms
All the soul based mob farming technology you'd ever need! Craftable spawners, compact single block mob farms, mob transport and killing, item collection and more.
 mod
CurseForge · Minecraft
Changed Custom Transfurs Creator Addon (by: Xywer)
This mod lets you easly customize your own unique latex mobs and transfurs! Changing their appearance in countless possiblities (wip)