Minecraft version
Back to mods 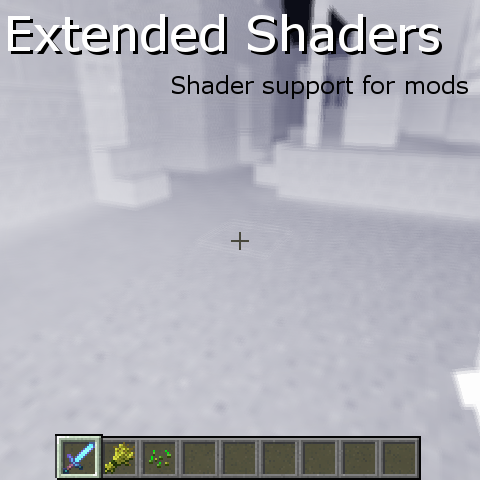
CurseForge · Minecraft mod
Extended Shaders
Adding shader support for mods
Choose a version Pick your version below, then grab the matching file.
Quick answer
Which Extended Shaders release should I use?
Latest stable file Extended Shaders 7.5.2
Game version 1.12.2
Loader Forge
Extended Shaders 7.5.2 targets 1.12.2 with Forge. The project page does not say whether this file belongs on the client, dedicated server, or both. No extra mods listed for this file.
Where it goes
Is Extended Shaders required on the client, server, or both?
The project page does not say whether this file belongs on the client, dedicated server, or both.
Client Source doesn’t say
Dedicated server Source doesn’t say
Loader for this release Forge
Required install it here Optional supported, not mandatory Not supported do not install here Source doesn’t say do not assume
The source does not explicitly classify this release as client-only or server-only.
What else does Extended Shaders 7.5.2 need?
Extended Shaders 7.5.2. Change the file and its required mods may change too.
This file does not list any required mods. Do not add a library just because a different file uses it.
This file does not list any required or optional mods.
Before you install it
Add Extended Shaders without breaking your instance.
Built for Extended Shaders 7.5.2. Pick another file and the loader, install side or required mods may change.
- 01
Stick to this file
Use Extended Shaders 7.5.2. It targets 1.12.2 with Forge; another release may have different loader, side or dependency requirements.
- 02
Bring the mods it needs
This file does not list any required mods. Do not add a library just because a different file uses it.
- 03
Put it on the correct side
The project page does not say whether this file belongs on the client, dedicated server, or both.
- 04
Pick the file you checked
Use the “Get this file” button beside Extended Shaders 7.5.2. It opens that exact file at the source.
About this project
What does Extended Shaders add?
NOTE: The 1.10.2 version is NOT optifine compatible due to the optifine-shadersmod merge in 1.8
Extended Shaders
Shader API for mods!
Extended Shaders is a coremod API that allows forges mod to use shaders, without needing to mess with coremodding and still being compatible with other mods that use shaders via this API.
It allows mods to add shaders and post-processing effects!
You cannot use this API without a good understanding of GLSL, including the GLSL compatibility profile as that is what you will be using.
This mod is Optifine compatible. However, post-processing will ONLY work if "fast render" is OFF.
If Optifine is installed, you can enable shaders by selecting 'Extended Shaders' in the shaderpacks menu. Otherwise, you can turn shaders on/off in the "Video Settings" menu.
this mod REQUIRES your PC support framebuffers, framebuffer blitting, and floating-point textures. It will crash if you do not. This is purposeful.
Readme from GitHub, for modders:
Extended Shaders mod for Minecraft 1.12.2.
The purpose of this API, and it's containing coremod, Extended Shaders, is to allow mods to use shaders and post-processors inside Minecraft without needing to learn how to make a coremod, and without sacrificing compatibility with other mods using this shader system.
It is designed to allow multiple mods to "attach" shader uniforms, variables, constants, and code without conflicting with each other, in a way not provided by GLSL itself.
It is NOT intended to be used by someone without a good understanding of GLSL.
HOW TO USE:
You will need to add the API classes to your project, PRESERVING the package names.
HOW TO MAKE A SHADER:
TO MAKE A VERTEX SHADER:
- create a file in your mod's assets, containing a list of the uniforms, variables, and constants, like this:
uniform float burnAmount; //uniform
varying vec4 fragCol; //variable
#define col vec3(.976, .969, .816) //constant
2. create a file in your mod's assets, containing the code for the shader, like this:
fragCol = fragCol * col;
3. create a new ShaderData instance, like this:
vertShader = new ShaderData(new ResourceLocation(modid, uniformslocation), new ResourceLocation(modid, codelocation), uniform name 1, uniform name 2, ...);
4. to turn it ON, do this:
ShaderRegistry.addVertexShader(vertShader);
5. to turn it OFF, do this:
ShaderRegistry.removeVertexShader(vertShader);
TO MAKE A FRAGMENT SHADER:
- create a file in your mod's assets, containing a list of the uniforms, variables, and constants, like this:
uniform float burnAmount; //uniform
varying vec2 textureCoords; //variable
#define col vec3(.976, .969, .816) //constant
2. create a file in your mod's assets, containing the code for the shader. you will work via modifying gl_fragData[0], or setting it if you prefer, like this:
float depth = sqrt(eyePos.x * eyePos.x + eyePos.y * eyePos.y + eyePos.z * eyePos.z);
if (depth > 64.0) discard;
depth = clamp(depth / 64.0, 0, 1);
float val = (max(max(gl_FragData[0].r, gl_FragData[0].g), gl_FragData[0].b) + min(min(gl_FragData[0].r, gl_FragData[0].g), gl_FragData[0].b)) * .25;
gl_FragData[0] = vec4(vec3(1.0) - col * (depth + val - depth * val), gl_FragData[0].a);
3. create a new ShaderData instance, like this:
fragShader = new ShaderData(new ResourceLocation(modid, uniformslocation), new ResourceLocation(modid, codelocation), uniform name 1, uniform name 2, ...);
4. to turn it ON, do this:
ShaderRegistry.addFragmentShader(fragShader);
5. to turn it OFF, do this:
ShaderRegistry.removeFragmentShader(fragShader);
PROVIDED UNIFORMS/VARIABLES:
check src\main\resources\assets\extendedshaders\shaders\shader_uniform.txt
HOW TO MAKE A POST-PROCESSOR:
- create a file in your mod's assets, containing a list of the post-processor's uniforms and constants, like this:
uniform float currentTime; //uniform
#define rad 3.0 //constant
2. create a file in your mod's assets, conatining the post-processor's code, like this:
float tx1 = rad * dx;
float tx2 = tx1 * .5;
float ty = rad * .5 * sqrt(3.0) * dy;
vec3 cp1 = texture2D(tex0, texCoords).rgb;
vec3 cp1 = texture2D(tex0, texCoords + vec2(tx1, 0)).rgb;
vec3 cp3 = texture2D(tex0, texCoords + vec2(tx2, ty)).rgb;
vec3 cp4 = texture2D(tex0, texCoords + vec2(-tx2, ty)).rgb;
vec3 cp5 = texture2D(tex0, texCoords + vec2(-tx1, 0)).rgb;
vec3 cp6 = texture2D(tex0, texCoords + vec2(-tx2, -ty)).rgb;
vec3 cp7 = texture2D(tex0, texCoords + vec2(tx2, -ty)).rgb;
gl_FragData[0] = vec4((cp1 + cp2 + cp3 + cp4 + cp5 + cp6 + cp7) / 7, 1);
3. create a new PostProcessor instance, like this
postProcessor = new PostProcessor(new ResourceLocation(modid, uniformslocation), new ResourceLocation(modid, codelocation), uniform name 1, uniform name 2, ...);
4. to turn it ON use this:
PostProcessorRegistry.addPostProcessor(postProcessor);
5. to turn it OFF use this:
PostProcessorRegistry.removePostProcessor(postProcessor);
PROVIDED UNIFORMS/VARIABLES: check src\main\resources\assets\extendedshaders\shaders\post_processor_frag_uniforms.txt
The API also allows for priorities on shaders and post-processors. Look through the API for more information on these advanced features.
Project description from CurseForge.
Pick your setup
Extended Shaders by Minecraft version and loader
Choose the version and loader you play, then open the matching release.
Minecraft version
1.10.2
1 loader buildMinecraft version
1.7.10
1 loader buildCheck the dependencies, then try the file in a copied instance before changing a world you care about.
Recent files
Extended Shaders versions and loaders
Extended Shaders 7.5.2
1.12.2 Extended Shaders 7.5.2.jar
16 May 2022
Client Source doesn’t say Server Source doesn’t say Dependencies No extras listed Listed on Release listing
Check the 1.12.2 · Forge setup Forge1.12.2 release
Extended Shaders 7.5.1
1.12.2 Extended Shaders 7.5.1.jar
15 May 2022
Client Source doesn’t say Server Source doesn’t say Dependencies No extras listed Listed on Release listing
Check the 1.12.2 · Forge setup Forge1.12.2 release
[1.12.2] Extended Shaders 7.5.jar
9 Jun 2020
Client Source doesn’t say Server Source doesn’t say Dependencies No extras listed Listed on Release listing
Check the 1.12.2 · Forge setup Forge1.12.2 release
[1.12.2] Extended Shaders 7.4.jar
27 Jan 2020
Client Source doesn’t say Server Source doesn’t say Dependencies No extras listed Listed on Release listing
Check the 1.12.2 · Forge setup Forge1.12.2 release
[1.12.2] Extended Shaders 7.3.jar
25 Jan 2020
Client Source doesn’t say Server Source doesn’t say Dependencies No extras listed Listed on Release listing
Check the 1.12.2 · Forge setup Forge1.12.2 release
[1.12.2] Extended Shaders 7.2.1.jar
15 Jan 2020
Client Source doesn’t say Server Source doesn’t say Dependencies No extras listed Listed on Release listing
Check the 1.12.2 · Forge setup Forge1.12.2 release
[1.12.2] Extended Shaders 7.2.jar
15 Jan 2020
Client Source doesn’t say Server Source doesn’t say Dependencies No extras listed Listed on Release listing
Check the 1.12.2 · Forge setup Forge1.12.2 release
[1.12.2] Extended Shaders 7.1b.jar
7 Apr 2019
Client Source doesn’t say Server Source doesn’t say Dependencies No extras listed Listed on Release listing
Check the 1.12.2 setup 1.12.2 release
[1.12.2] Extended Shaders 7.1a.jar
18 Mar 2019
Client Source doesn’t say Server Source doesn’t say Dependencies No extras listed Listed on Release listing
Check the 1.12.2 setup 1.12.2 release
[1.12.2] Extended Shaders 7.1.jar
16 Mar 2019
Client Source doesn’t say Server Source doesn’t say Dependencies No extras listed Listed on Release listing
Check the 1.12.2 setup 1.12.2 release
[1.7.10] Extended Shaders 6.0.jar
21 Feb 2018
Client Source doesn’t say Server Source doesn’t say Dependencies No extras listed Listed on Release listing
Check the 1.7.10 setup 1.7.10 release
[1.7.10] Extended Shaders 5.1.jar
23 Dec 2017
Client Source doesn’t say Server Source doesn’t say Dependencies No extras listed Listed on Release listing
Check the 1.7.10 setup 1.7.10 release
Looking for an older file? The official CurseForge project page is in Resources.
 mod
mod CurseForge · Minecraft
KubeUI
KubeUI- A KubeJS addon that lets scripts build real, interactive Minecraft GUIs
 mod
mod CurseForge · Minecraft
Pineapple Delight Legacy
Backport of the Pineapple Delight mod to version 1.12.2
 mod
mod CurseForge + Modrinth · Minecraft
LetMeEnchant
Removes many limits related with anvils and enchantments