Fabric API Needed by Ratatouille 1.4.3-1.21.1
requiredMatching file found Matched file: 0.116.18+1.21.1

Modrinth · Minecraft mod
Library for doctor4t's mods and supporter cosmetics
Quick answer
Ratatouille 1.4.3-1.21.1 targets 1.21.1 with Fabric, Quilt. Installation on the client is optional. Installation on the dedicated server is optional. All 1 required mods have matching files.
Where it goes
Installation on the client is optional. Installation on the dedicated server is optional.
The source marks this as usable on both the client and server.
1.4.3-1.21.1. Change the file and its required mods may change too.
Install Fabric API first. We found matching files for this game-version and loader setup.
We only count dependency files that match this setup. A file for another loader does not fill the gap.
Before you install it
Built for Ratatouille 1.4.3-1.21.1. Pick another file and the loader, install side or required mods may change.
Use 1.4.3-1.21.1. It targets 1.21.1 with Fabric, Quilt; another release may have different loader, side or dependency requirements.
Install Fabric API first. We found matching files for this game-version and loader setup.
Installation on the client is optional. Installation on the dedicated server is optional.
Use the “Get this file” button beside 1.4.3-1.21.1. It opens that exact file at the source.
About this project


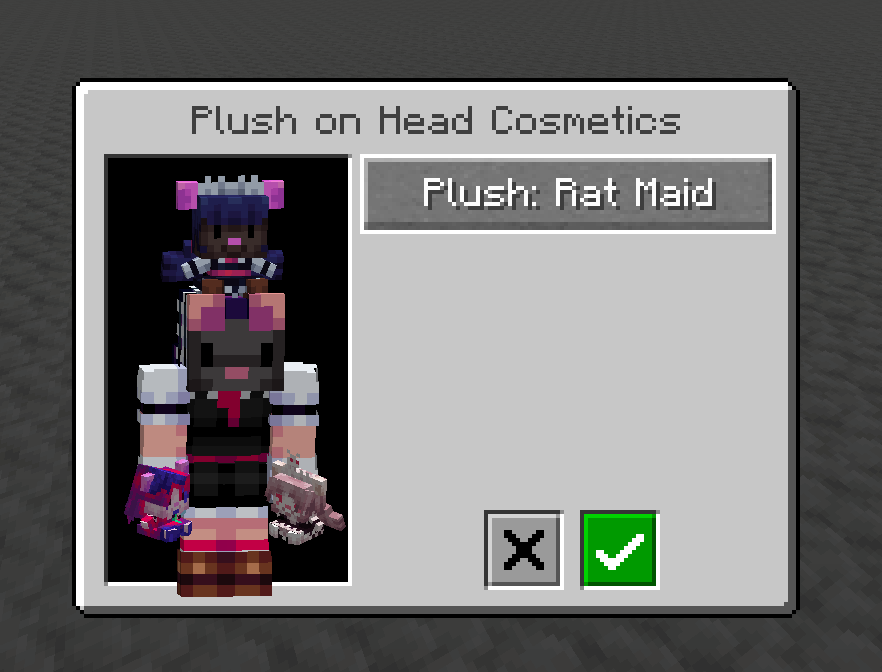
RendersArmInFirstPerson interface in your feature renderer.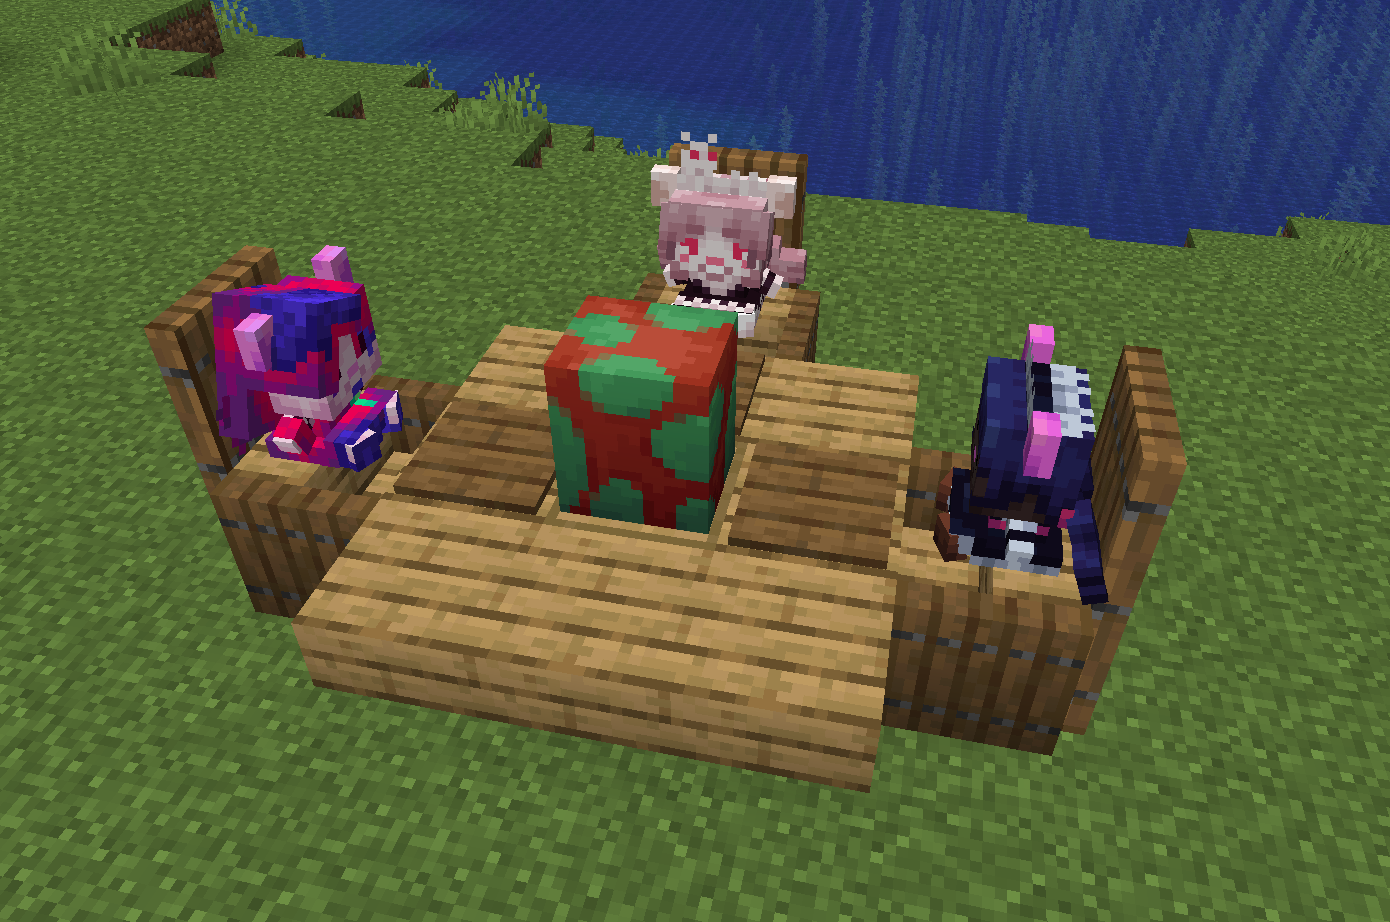
repositories {
    maven {
        name = 'Ladysnake Mods'
        url = 'https://maven.ladysnake.org/releases'
}

dependencies {
    modImplementation "dev.doctor4t:ratatouille:${project.ratatouille_version}"
}
This util allows you to easily register new armor sets that use a custom model with a single method call (and that custom model as the game does need to know what you wish to render).
Before we can add our custom armor, we need a model that respects a few rules. You can find an armor template model (Blockbench model file) and texture in the RESOURCES folder of the repository. While you can edit this model and texture freely in order to shape up the armor of your dreams, please note that the existing groups are very important and while you can add new sub-groups to them, you cannot and should not delete any existing group as they allow the library to know what should be displayed when a player (or armor stand or mob) dons armor pieces:
helmet displays when the helmet item is equippedbody_chestplate, right_arm_chestplate and left_arm_chestplate display when the chestplate item is equippedbody_leggings, right_leg_leggings and left_leg_leggings display when the leggings item is equippedright_leg_boot and left_leg_boot display when the boots item is equippedOnce you have finalized your model, you can export it with Blockbench: File -> Export -> Export Java Entity. Open the generated Java class and copy the lines between ModelPartData modelPartData = modelData.getRoot(); and the line right before the return (included) in getTexturedModelData(). Ratatouille adds a new model class type that simplifies armor model definition called CustomArmorModelDefinition; extend that class and implement the addModelParts method by pasting the snippet you copied from the generated model class. Then implement getTexture(); the simplest way to do so is to have a static Identifier for your armor texture in your Model Definition class and return that, but if you wish to do a special logic that varies the returned texture you can naturally do so as well.
The second - and last - step is to register your custom armor rendering in your client initialization. Call CustomModelArmorUtil.registerCustomArmor and give it the required parameters:
Identifier id: The id of the custom armor. This is used in order to automatically generate and register the model layer of your armor, it should therefore be unique.ArmorDisplayConditions displayConditions: The display conditions that need to be met for your armor parts to render. If you want a simple armor that displays its parts for each item you equip, the ItemSetDisplayConditions allows you to define the helmet, chestplate, leggings and boots items and will automatically check which armor items are equipped and need to be displayed, as well as prevent the rendering of the vanilla armor model with a missing texture. If you wish to have a custom logic for displaying different pieces that is not just checking whether the item is being worn, you can implement the ArmorDisplayConditions and its four shouldDisplay methods.CustomArmorModelDefinition armorModelDefinition: The model definition we created in Step 1, simply create a new instance of it.int textureWidth, int textureHeight: The armor's texture width and height.Registering your armor through this method call will take care of everything for you, like creating the textured model data, model layer and appending the feature to the player / armor stand / mob renderers. If you need to access the model data or model layer of the armor, you can find them in the CustomModelArmorUtil.CUSTOM_ARMOR_MODELS HashMap by using the armor's displayConditions as the key.
To register a background ambience, all you need to do is call the AmbienceUtil.registerBackgroundAmbience method in your client initializer class and give it a new BackgroundAmbience object with the required parameters:
SoundEvent soundEvent: The ambient loop sound to play.SoundCategory soundCategory: The audio category to play the sound in.PlayPredicate predicate: The predicate determining whether the sound is allowed to play or not. Takes a ClientPlayerEntity and must return a boolean.int fadeIn: The fade-in time of the ambient loop when it starts playing (in ticks).int fadeOut: The fade-out time of the ambient loop when it stops playing (in ticks).To register a block entity ambience, all you need to do is call the AmbienceUtil.registerBlockEntityAmbience method in your client initializer class and give it the BlockEntityType<? extends BlockEntity> that should play said ambience and a new BlockEntityAmbience object with the required parameters:
SoundEvent soundEvent: The ambient loop sound to play.SoundCategory soundCategory: The audio category to play the sound in.PlayPredicate predicate: The predicate determining whether the sound is allowed to play or not. Takes a BlockEntity and must return a boolean.int fadeIn: The fade-in time of the ambient loop when it starts playing (in ticks).int fadeOut: The fade-out time of the ambient loop when it stops playing (in ticks).Project description from Modrinth.
Pick your setup
Choose the version and loader you play, then open the matching release.
Check the dependencies, then try the file in a copied instance before changing a world you care about.
Recent files
ratatouille-1.4.3-1.21.1.jar
18 Dec 2025
ratatouille-1.4.2-1.21.1.jar
18 Dec 2025
ratatouille-1.4.1-1.21.1.jar
20 Nov 2025
ratatouille-1.4-1.21.1.jar
17 Nov 2025
ratatouille-1.3-1.21.1.jar
10 Aug 2025
ratatouille-1.2.5-1.21.1.jar
9 Aug 2025
ratatouille-1.2.4-1.21.1.jar
6 Aug 2025
ratatouille-1.2.3-1.21.1.jar
6 Aug 2025
ratatouille-1.2.2-1.21.1.jar
19 Jul 2025
ratatouille-1.2.1-1.21.1.jar
17 Jul 2025
ratatouille-1.2.0-1.21.1.jar
17 Jul 2025
ratatouille-1.1.3-1.21.1.jar
14 Jul 2025
Looking for an older file? The official Modrinth project page is in Resources.
 mod
Disposable public fixture for testing the Modpacks.ch GitHub catalogue flow
 mod
This mod was designed and planned to improve the experience of creating SMPs servers in Minecraft. Its main function is to ban and control items, blocks, and mods, with the ability to unban those same items, blocks, or mods for specific players.
 mod
A complete overhaul of the minecraft inventory system. Turning every container into a window, where multiple can be open at the same time.