Hytale version
Back to mods 
CurseForge · Hytale mod
Starky's Randomizer - Library
Library mod for randomizing textures live in-game!
Choose a version Pick your version below, then grab the matching file.
Quick answer
Which Starky's Randomizer - Library release should I use?
Latest stable file Starky's Randomizer-1.0.0.jar
Game version 0.5
Mod system Built-in Hytale mod system
Starky's Randomizer - Library Starky's Randomizer-1.0.0.jar targets 0.5. Do not install it as a separate client mod. Enable it on the world host—the local server in singleplayer or the dedicated server in multiplayer. No required dependencies listed for this file.
Where it goes
Where should Starky's Randomizer - Library be installed in Hytale?
Do not install it as a separate client mod. Enable it on the world host—the local server in singleplayer or the dedicated server in multiplayer.
Separate client mod Not supported
World host / dedicated server Required
Mod system for this release Built-in Hytale mod system
Required install it here Optional supported, not mandatory Not supported do not install here Source doesn’t say do not assume
Put Hytale mods on the world host or dedicated server. Singleplayer runs a local server too; Hytale does not use separate client mods.
What else does Starky's Randomizer - Library Starky's Randomizer-1.0.0.jar need?
Starky's Randomizer-1.0.0.jar. Change the file and its required mods may change too.
This file does not list any required mods. Do not add a library just because a different file uses it.
This file does not list any required or optional project dependencies. Check the creator notes before changing an existing world.
Before you install it
Add Starky's Randomizer - Library without breaking your instance.
Built for Starky's Randomizer - Library Starky's Randomizer-1.0.0.jar. Pick another file and the loader, install side or required mods may change.
- 01
Stick to this file
Use Starky's Randomizer-1.0.0.jar. It targets 0.5; another release may target a different game build or dependency set.
- 02
Bring the mods it needs
This file does not list any required mods. Do not add a library just because a different file uses it.
- 03
Enable it on the world host
Do not install it as a separate client mod. Enable it on the world host—the local server in singleplayer or the dedicated server in multiplayer.
- 04
Pick the file you checked
Use the “Get this file” button beside Starky's Randomizer-1.0.0.jar. It opens that exact file at the source.
About this project
What does Starky's Randomizer - Library add?
Starky's Randomizer (Library) — API Guide

Starky's Randomizer is a library mod. It does nothing on its own: it exposes one public, stateless
utility class, org.starkymods.plugin.api.TextureRandomizer, that recolours and patterns textures exactly
like the in-game Live Painter & Editor mod randomizers. Any mod (or tooling) can call it directly.

📊 Anonymous counter: Randomizations are counted anonymously toward the public total above (no personal data).
📈 Metrics: This mod also uses HStats to report anonymous mod-usage metrics. No personal data is collected.
NOTE: Both can be disabled.
It is written in pure Java/AWT — it has no Hytale types in its signatures. Everything goes in and comes
out as a standard java.awt.image.BufferedImage. That is deliberate: the result is a normal image you can save, send, or feed into any pipeline you like.
Group / Name: StarkyMods / Starky's Randomizer
Version: Last version (Example: "1.0.0")
- API class: org.starkymods.plugin.api.TextureRandomizer
1. Installing the dependency
a) Declare it as a required dependency in your mod's manifest.json:
"Dependencies": { "StarkyMods:Starky's Randomizer": ">=1.0.0"}
The dependency key is "Group:Name" (colon separator, the Name verbatim including the apostrophe).
The value is a semver range (*, >=1.0.0, >=1.0.0 <2.0.0, …).
The server guarantees Starky's Randomizer is loaded before your mod; if it is missing or version-incompatible, your mod refuses to load at boot (you never get a
runtime NoClassDefFoundError).
b) Compile against it, but do NOT bundle it in build.gradle.kts:
dependencies { implementation(files("$hytaleHome/install/$patchline/package/game/latest/Server/HytaleServer.jar")) compileOnly(files("$hytaleHome/UserData/Mods/Starky's Randomizer-1.0.0.jar"))}
Use compileOnly—
the classes are provided at runtime by the Randomizer plugin's own class loader.
If you bundle them with implementation into your jar,
you create duplicate classes under your own loader and break the shared-class identity
(LinkageError / ClassCastException).
With a declared required dependency you can then
call the API directly — no reflection needed:
import org.starkymods.plugin.api.TextureRandomizer;
import org.starkymods.plugin.api.TextureRandomizer.PixelChange;
2. The core model — how the API thinks
Three ideas drive everything:
In and out is a BufferedImage. You give it an image to read; it never modifies your input.
**It returns a "change list", not a new image.**Every recolour method returns a List<PixelChange> — a record PixelChange(int x, int y, int argb) — describing exactly which pixels to repaint and to what ARGB colour.
You decide what to do with that list. This is the most important design point (check num. 4):
because the changes are data, you can apply them onto a different image than the one you analysed.
- power (0–100) is the single strength knob. It governs pattern probability, colour-grouping granularity,
neutral-colour thresholds, and how far a recoloured pixel may drift from the original.
0 = very subtle, 50 = balanced, 100 = full replacement.
Two more rules that always hold:
Fully transparent pixels (alpha 0) are never touched.
Each call is freshly random (seeded from the clock), so calling the same method twice gives two different
variations.
3. API reference
randomizeTexture(BufferedImage image, int power, boolean allowPattern) → List<PixelChange>
A full random palette variation of the whole texture. Similar source colours are grouped so each region
recolours coherently.
allowPattern = true lets a random overlay pattern (stripes, chevrons, waves…) also be
mixed in — its probability rises with power.
Never returns null (returns an empty list for a null/empty image).
This is "RANDOMIZE / AUTO-PAINT" and "RANDOMIZE COLORS".
randomizeColorGroup(BufferedImage image, int power, int rank) → List<PixelChange>
Randomizes only one tone group —
rank 0 = the largest tone (by pixel count),
rank 1 = the second-largest, etc.
This is "RANDOMIZE PRIMARY / SECONDARY".
The returned list contains changes for that group's pixels only — no other pixel is ever included.
Returns null if the image has no such dominant group (e.g. asking for rank 1 on a single-tone texture).
A "tone group" is broad: every near-neutral pixel (grey/white/black) is one group, and coloured pixels group by a wide hue family only — brightness and saturation are ignored.
So all the browns can be one group and all the greys can be another, regardless of lighting.
(Tunable inside the library via TONE_HUE_BUCKETS and TONE_NEUTRAL_SATURATION.)
addPattern(BufferedImage image, int power, int targetRank) → List<PixelChange>
Overlays a random generated pattern.
targetRank =
-1 = the whole texture;
0 = only the primary tone group;
1 = only the secondary.
Returns null if targetRank ≥ 0 but no such group exists.
This is "ADD PATTERN".
dominantColorGroup(BufferedImage image, int rank) → OptionalInt
Returns the key of the rank-th most common tone group, or empty if there is none.
Use it if you want to drive your own region-targeted effect using the same grouping the randomizers use.
toneGroup(int argb) → int
The broad tone-group key of a single ARGB pixel (see the tone-group note above).
Two pixels with the same key belong to the same tone.
Useful for "is this pixel part of the group I'm targeting?" checks.
apply(BufferedImage image, List<PixelChange> changes) → int
Convenience writer: writes every change into image via setRGB, skipping out-of-bounds and no-op pixels, and returns how many pixels actually changed.
This is the one method that mutates an image — the one you pass to it.
4. ⭐ Getting a texture in, and the result out to use anywhere
The recolour methods give you a List<PixelChange>.
The full round trip is: load a BufferedImage → get
changes → apply them → export the BufferedImage.
Because the changes are plain data,
the image you apply onto does not have to be the one you analysed—
that is what unlocks "reset only one group" and "build up".
4.1 Getting a BufferedImage IN
From a file or any stream:
BufferedImage img = ImageIO.read(new File("path/to/texture.png"));
// or from a classpath/pack resource:
BufferedImage img = ImageIO.read(getClass().getResourceAsStream("/Common/.../Texture.png"));
From raw PNG bytes (e.g. the blob of a Hytale common asset, or bytes read out of a pack/zip):
BufferedImage img = ImageIO.read(new ByteArrayInputStream(pngBytes));
From scratch (procedural):
BufferedImage img = new BufferedImage(16, 16, BufferedImage.TYPE_INT_ARGB);
// fill img.setRGB(...) however you like
Always work in TYPE_INT_ARGB so the alpha channel (and the skip alpha 0 rule) behaves. If you read an image of another type and want to be safe, copy it into an ARGB image first.
4.2 Applying the changes
Simplest — recolour the same image in place:
BufferedImage img = ImageIO.read(file);
TextureRandomizer.apply(img, TextureRandomizer.randomizeTexture(img, 50, true));
// img now holds the randomized texture
**Apply onto a different image (the powerful pattern).**Analyse one image, paint the result onto another.
This is exactly how "reset only the primary group, keep my other edits" works:
BufferedImage base    = loadOriginalImage();   // the pristine/base texture
BufferedImage current = loadMyEditedImage();   // your in-progress edits

// Detect + randomize the PRIMARY tone group from the BASE,
// then apply only those changes onto your CURRENT edited image:
List<PixelChange> changes = TextureRandomizer.randomizeColorGroup(base, 50, 0);
if (changes != null) {
    TextureRandomizer.apply(current, changes); // only the primary group's pixels change; the rest of your edits stay
}
Pass the base image and apply onto current → reset + randomize just that group.
Pass current and apply onto current → build up on that group.
For the whole texture, use randomizeTexture / addPattern the same way.
Apply manually (if you want your own undo/history layer instead of apply()):
for (PixelChange c : changes) {
    image.setRGB(c.x(), c.y(), c.argb()); // record into your own undo system here
}
(This is what Live Painter itself does
—
it maps each PixelChange onto its own document so the edit is undoable.)
4.3 Getting the randomized texture OUT — apply/generate it anywhere
Once you've applied the changes, you hold a normal BufferedImage.
From here it goes wherever you need:
Write it to a PNG file (e.g. into a pack folder, an export dir, a generated-assets folder):
ImageIO.write(img, "png", new File("output/Texture.png"));
Turn it into PNG bytes (to send over the network, store, or hand to an asset system):
ByteArrayOutputStream baos = new ByteArrayOutputStream();
ImageIO.write(img, "png", baos);
byte[] pngBytes = baos.toByteArray();
**Use it live in Hytale.**The image/bytes are now ordinary content, so you plug them into whatever asset path you
already use, for example:
- Generate a brand-new texture asset:
write the PNG into a watched Common pack folder under a fresh name
(e.g. Items/YourMod/MyTex_123.png) and register/publish it as a CommonAsset, then reference that name from your item/block/model. New unique names are always safe.
- Replace an existing texture globally:
write the PNG over an existing common asset name and publish it
(CommonAssetModule.sendAsset(...)).
Connected clients update live; on restart, re-publish it after assets load so it wins.
(This is "Replace Original..." in Live Painter.)
- Apply to a live entity model:
bake the new texture, point the entity's ModelComponent at it, and putComponent it.
Those last steps use Hytale's own asset / common-asset classes,
which is intentionally outside the Randomizer
library (it stays pure so it works in any context
—
server mod, build tool, or unit test).
Live Painter & Editor is the reference consumer if you want to
see a full asset-publishing pipeline built on top of these
> BufferedImage results.
5. Ready-made recipes
import static org.starkymods.plugin.api.TextureRandomizer.*;
// 1) Full random repaint with patterns, in place
apply(img, randomizeTexture(img, 60, true));
// 2) Full recolour, no patterns
apply(img, randomizeTexture(img, 40, false));
// 3) Randomize just the dominant (primary) tone — keep everything else
List<PixelChange> p = randomizeColorGroup(img, 50, 0);
if (p != null) apply(img, p); else log("no primary tone group");
// 4) Randomize just the secondary tone
List<PixelChange> s = randomizeColorGroup(img, 50, 1);
if (s != null) apply(img, s);
// 5) Pattern over the whole texture
apply(img, addPattern(img, 70, -1));
// 6) Pattern over only the primary tone group
List<PixelChange> pat = addPattern(img, 70, 0);
if (pat != null) apply(img, pat);
// 7) Your own targeted effect using the library's grouping
OptionalInt primary = dominantColorGroup(img, 0);
if (primary.isPresent()) {
    int key = primary.getAsInt();
    for (int y = 0; y < img.getHeight(); y++)
        for (int x = 0; x < img.getWidth(); x++) {
            int argb = img.getRGB(x, y);
            if (((argb >>> 24) & 0xff) != 0 && toneGroup(argb) == key) {
                // do something custom to every pixel of the primary tone
            }
        }
}
6. Notes & gotchas
- **No mutation except apply().**All recolour methods read the input and return data; only apply() writes
(into the image you hand it).
- null means "no such group." randomizeColorGroup and group-targeted addPattern return null when the
requested tone group doesn't exist — always check before applying.
randomizeTexture never returns null.
Alpha 0 is preserved — transparent pixels are skipped, so silhouettes/edges stay clean.
**Randomness is per call.**No seed parameter; each invocation is a fresh variation.
To reproduce a look, keep the resulting image, not the call.**Thread-safety.**The class is stateless and the methods are pure (each makes its own Random), so different
threads can call it freely — just don't let two threads mutate the same BufferedImage at once.
- **Performance.**Each call is O(width × height). Textures are tiny (16² … 256²) so it's instant, but if you batch
many large images, do it off the main server thread.
Thanks for downloading!
Project description from CurseForge.
Pick your setup
Starky's Randomizer - Library releases for each Hytale build.
Choose the version and loader you play, then open the matching release.
Check the dependencies, then try the file in a copied instance before changing a world you care about.
Recent files
Starky's Randomizer - Library releases and Hytale builds
Starky's Randomizer-1.0.0.jar
23 Jun 2026
Client Not supported Server Required Dependencies No extras listed Listed on Project page
Check the 0.5 setup 0.5 release
Looking for an older file? The official CurseForge project page is in Resources.
 mod
mod CurseForge · Hytale
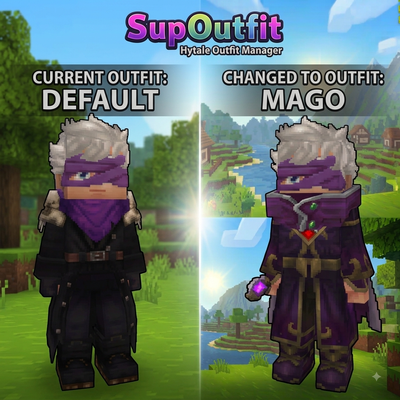
SupOutfit
Server-side outfit management system with commands and custom UI support.
 mod
mod CurseForge · Hytale
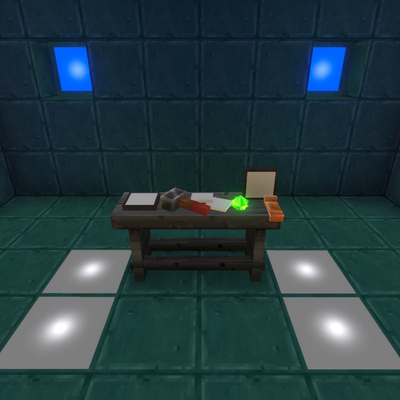
Simple Lighting Solutions
Currently in beta, adds simple modern looking block-lights. Create a light bench to begin crafting. Currently only Aqua beveled lights available, although an expansion update will drop shortly.
 mod
mod CurseForge · Hytale
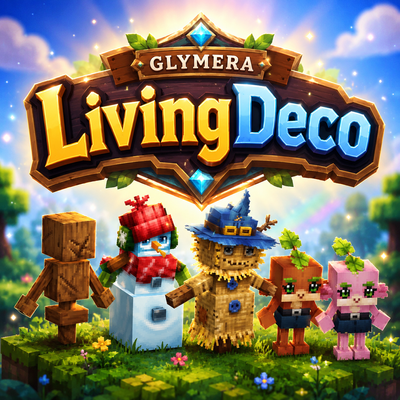
GlymeraLivingDeco
Your decoration comes alive! Scarecrow, Training Dummy, Snowman and both Kweebec plushies walk your world - as friendly wanderers that wave at you, or as haunted fighters. Natural spawning, fully configurable. /gscare