Fabric API Needed by *NEW* VM computers newvmcomputers-1.4.15-1.20.1-fabric.jar
requiredMatching file found Matched file: [1.20.1] Fabric API 0.92.12+1.20.1

CurseForge · Minecraft mod
This project adds working computers as vm's in Minecraft, this is a fan made port of original VM computers by Delta2Force
Quick answer
*NEW* VM computers newvmcomputers-1.4.15-1.20.1-fabric.jar targets 1.20.1 with Fabric. The project page does not say whether this file belongs on the client, dedicated server, or both. All 1 required mods have matching files.
Where it goes
The project page does not say whether this file belongs on the client, dedicated server, or both.
The source does not explicitly classify this release as client-only or server-only.
newvmcomputers-1.4.15-1.20.1-fabric.jar. Change the file and its required mods may change too.
Install Fabric API first. We found matching files for this game-version and loader setup.
We only count dependency files that match this setup. A file for another loader does not fill the gap.
Before you install it
Built for *NEW* VM computers newvmcomputers-1.4.15-1.20.1-fabric.jar. Pick another file and the loader, install side or required mods may change.
Use newvmcomputers-1.4.15-1.20.1-fabric.jar. It targets 1.20.1 with Fabric; another release may have different loader, side or dependency requirements.
Install Fabric API first. We found matching files for this game-version and loader setup.
The project page does not say whether this file belongs on the client, dedicated server, or both.
Use the “Get this file” button beside newvmcomputers-1.4.15-1.20.1-fabric.jar. It opens that exact file at the source.
About this project
THIS IS A FAN MADE PORT OF VM COMPUTERS BY Delta2Force
Transfers VM Computers to modern Minecraft version (1.20.1)
Check out the original VM Computers mod by Delta2Force:
https://www.curseforge.com/minecraft/mc-mods/vm-computers
If you have problems with this port, please submit them to my GitHub.
Join the VM Computers Discord server:
https://discord.gg/gNgaxZa4yX
Note: Only accepts Bitcoin and BitcoinCash
BTC3GubEkHV69gCkjWhRgRWYqWqyjcWW3gxFF
BCHbitcoincash:qq6jttzlvgj68lvecnh75pt3znezj4vx6sysfvj3j5
Craft an Ordering Tablet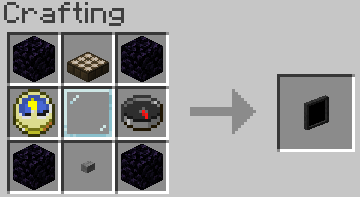
Wait until it detects a satellite (they appear quite often)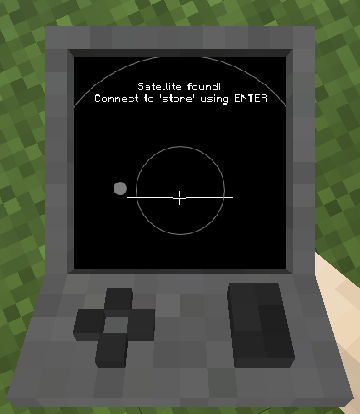
The rest is (hopefully) self‑explanatory.
Virtual Hard Drives are created by right‑clicking while holding a hard drive.
It does not matter if it already has a disk image assigned — the menu will always open.
You can either:
.minecraft/vm_computers/vhdsISO images (CD/DVD images) should be placed in:
.minecraft/vm_computers/isos
After placing them there, they can be selected in the PC case menu.
You will need the following items (purchased using the Ordering Tablet):
Note:
Keyboard and mouse are currently decorative only, and the VM can start even without a hard drive or ISO.
Place the PC Case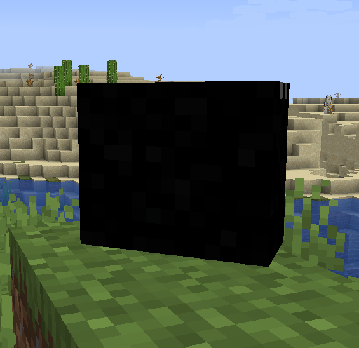
Right‑click the case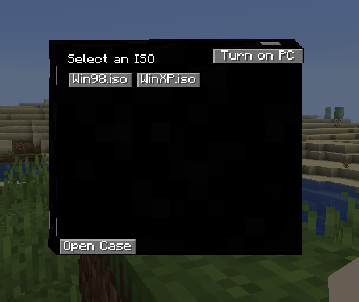
(Optional) Select an ISO image.
Open the case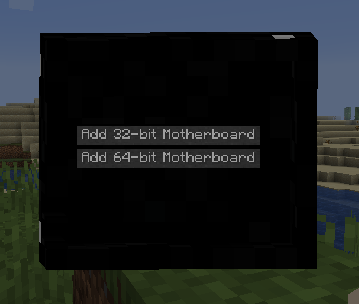
Note: Buttons will be disabled if the required item is not in your inventory.
Note:
To stop interacting with the computer, press the keys shown in the top‑right corner of the screen.
If you'd like to contribute:
For larger changes, create an issue first to discuss the idea.
Use lambda expressions when appropriate
(), {} is often faster and cleaner.Follow the existing code style
Write clear commit messages
Update file.When creating a pull request, ensure all intended changes are included
Project description from CurseForge.
Pick your setup
Choose the version and loader you play, then open the matching release.
Check the dependencies, then try the file in a copied instance before changing a world you care about.
Recent files
8 Apr 2026
newvmcomputers-1.5-1.20.1.jar
29 Mar 2026
newvmcomputers-1.5-1.20.1.jar
22 Mar 2026
newvmcomputers-1.4.15-1.20.1.jar
9 Mar 2026
Looking for an older file? The official CurseForge project page is in Resources.
 mod
Mod that aims to fix multiple issues with the Minecraft statistics.🤓
 mod
Fight back against horror mods with holy crosses, holy water, churches and exorcism rituals that banish, block and silence the creatures haunting your world.
 mod
Lightweight and highly accurate Metrics (not just FPS!) with a fully customizable HUD