Minecraft version
Back to mods 
CurseForge · Minecraft mod
Curvegen
Turn ellipses, equations and Bézier curves into blocks, slabs, stairs, walls and more. Preview the build in game, then place it or export it to Litematica.
Choose a version Pick your version below, then grab the matching file.
Quick answer
Which Curvegen release should I use?
Latest stable file Curve Generator 2.0.0+mc26.3-neoforge
Game version 26.3
Loader NeoForge
Curvegen Curve Generator 2.0.0+mc26.3-neoforge targets 26.3 with NeoForge. The project page does not say whether this file belongs on the client, dedicated server, or both. No extra mods listed for this file.
Where it goes
Is Curvegen required on the client, server, or both?
The project page does not say whether this file belongs on the client, dedicated server, or both.
Client Source doesn’t say
Dedicated server Source doesn’t say
Loader for this release NeoForge
Required install it here Optional supported, not mandatory Not supported do not install here Source doesn’t say do not assume
The source does not explicitly classify this release as client-only or server-only.
What else does Curvegen Curve Generator 2.0.0+mc26.3-neoforge need?
Curve Generator 2.0.0+mc26.3-neoforge. Change the file and its required mods may change too.
This file does not list any required mods. Do not add a library just because a different file uses it.
This file does not list any required or optional mods.
Before you install it
Add Curvegen without breaking your instance.
Built for Curvegen Curve Generator 2.0.0+mc26.3-neoforge. Pick another file and the loader, install side or required mods may change.
- 01
Stick to this file
Use Curve Generator 2.0.0+mc26.3-neoforge. It targets 26.3 with NeoForge; another release may have different loader, side or dependency requirements.
- 02
Bring the mods it needs
This file does not list any required mods. Do not add a library just because a different file uses it.
- 03
Put it on the correct side
The project page does not say whether this file belongs on the client, dedicated server, or both.
- 04
Pick the file you checked
Use the “Get this file” button beside Curve Generator 2.0.0+mc26.3-neoforge. It opens that exact file at the source.
About this project
What does Curvegen add?
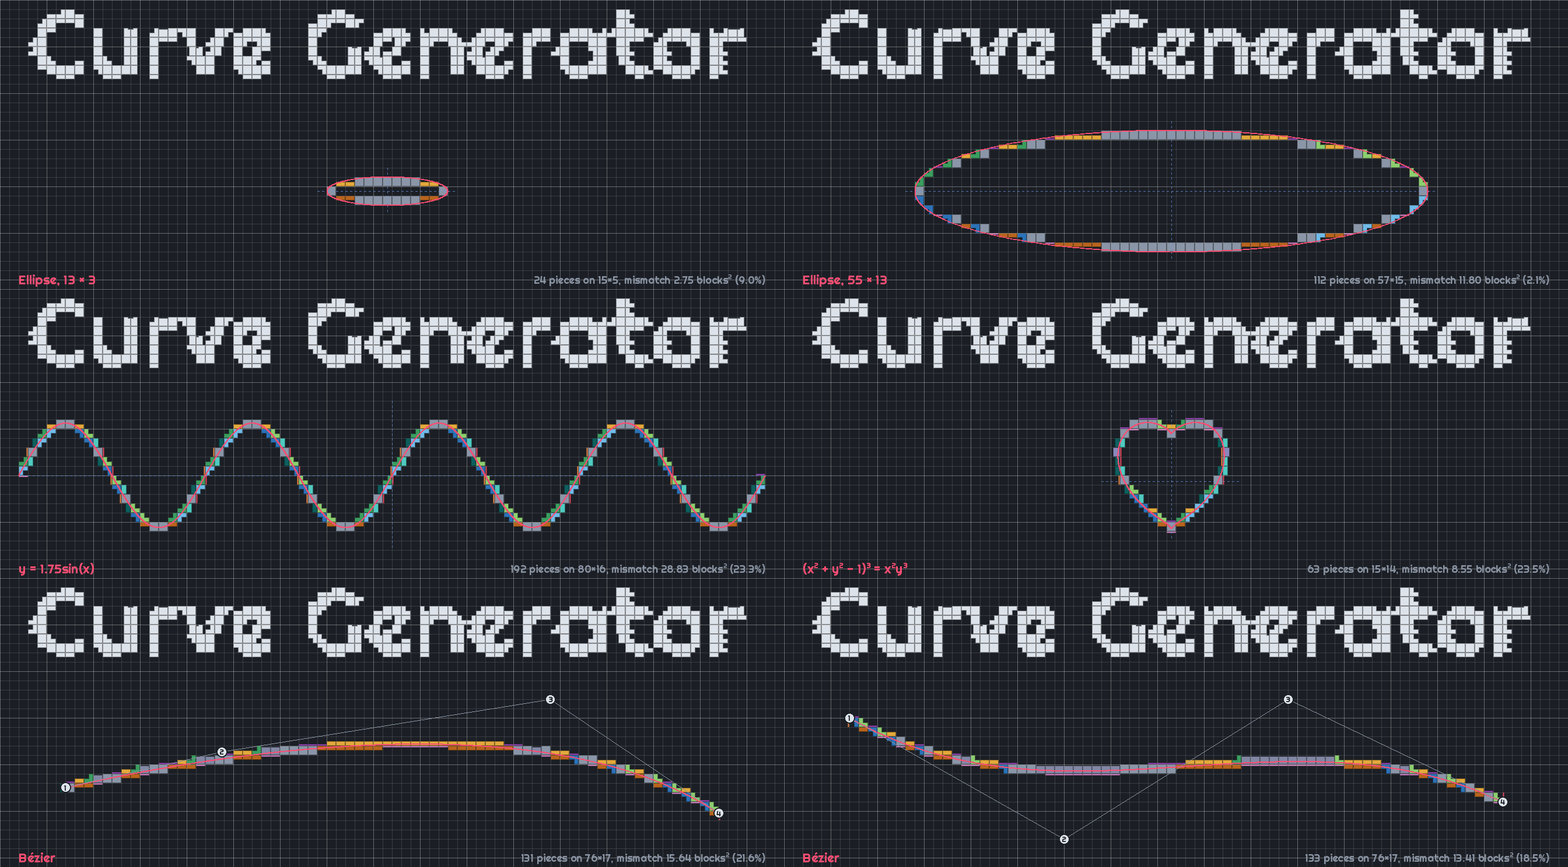


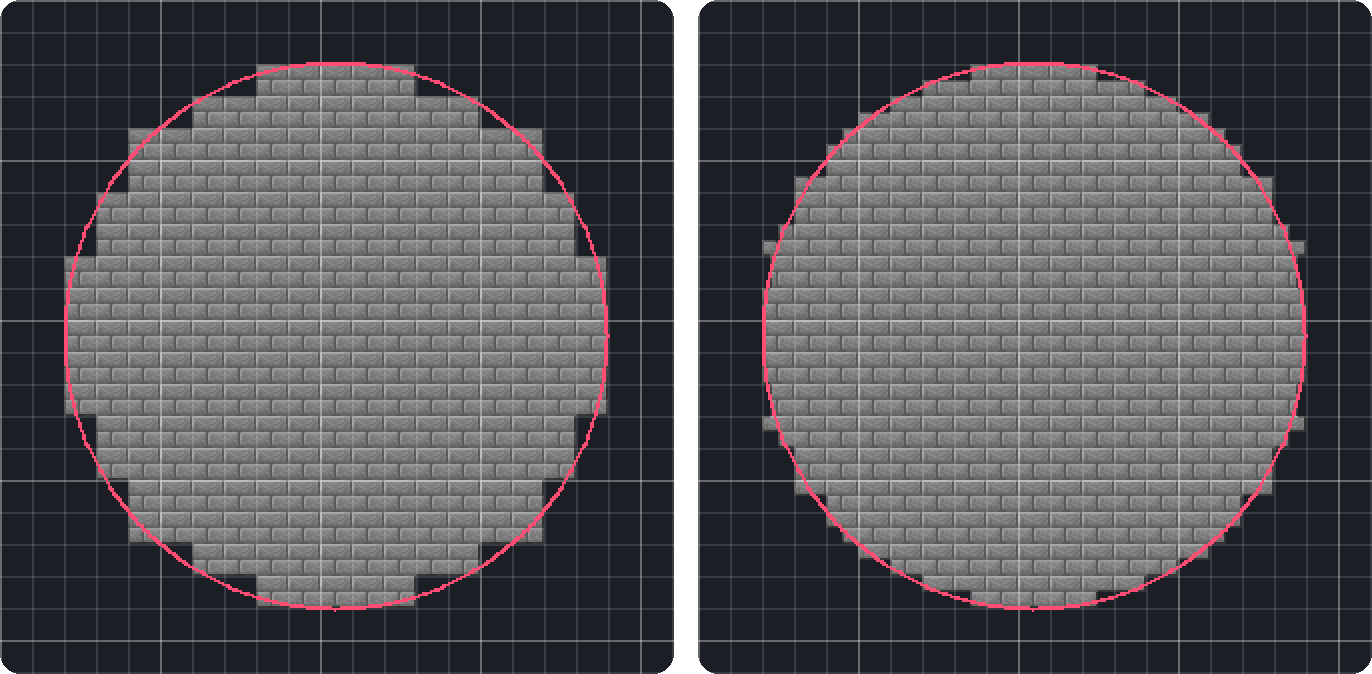
Curve Generator turns shapes into blocks. In 2D it builds ellipses, equations and Bézier curves. In 3D it builds ellipsoids, toruses, equations in x, y and z, Bézier curves and Bézier surfaces. For every block along the shape it picks the full block, slab, stair, trapdoor, shelf, fence, glass pane or wall that matches most closely, so a circle looks rounder than one built from full blocks alone.
The shape appears in your world as a hologram before anything is built. You drag its handles to resize it and its points to bend it, and the blocks update as you go. Then you place it, or export it as a Litematica schematic.
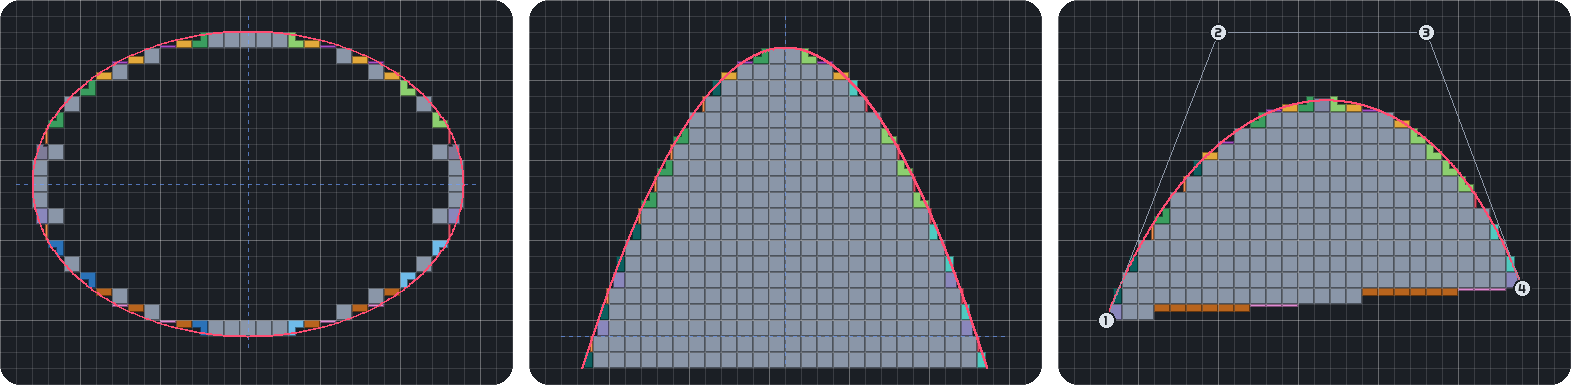
The 2D shapes in the menu's preview: ellipse, equation and Bézier curve. The pink line is the true curve.
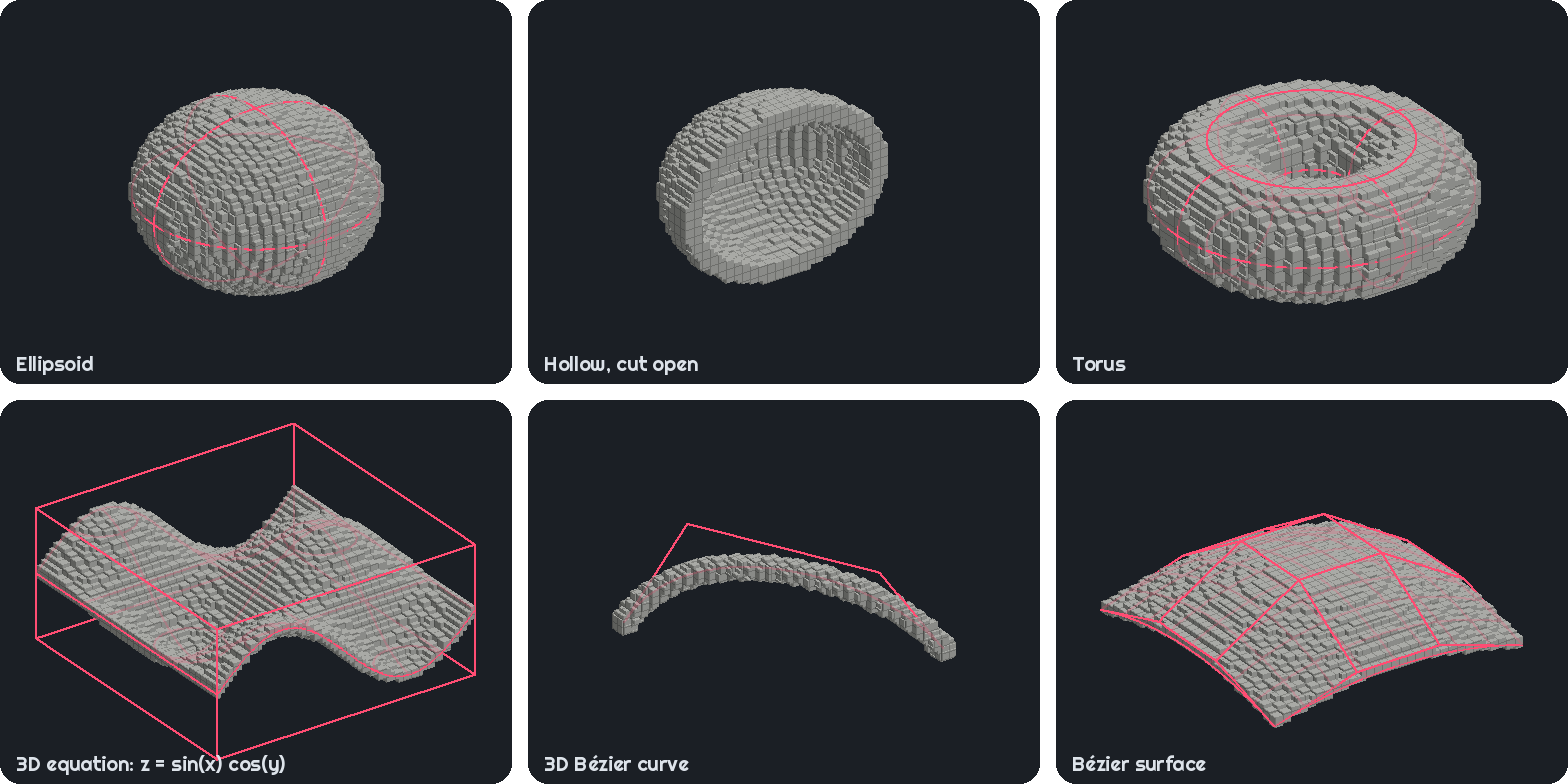
The 3D shapes in the menu's preview: ellipsoid, torus, 3D equation, 3D Bézier curve and Bézier surface. The pink lines are the true shape.

How to use it
- Hold V to open the radial menu. Point at 2D shapes or 3D shapes and let go, then click a shape. Its hologram appears at the block you're looking at.
- Look at a handle on the hologram's box so it lights up, hold the left mouse button and look where it should go. Hold sneak to move the opposite side too.
- Press Page Up and Page Down to move the shape away from you and back. Home and End push out and pull in the side you're facing. R rotates the shape and U tips it over.
- Open the radial menu again for Shape options, such as the fill, thickness or equation, and for Blocks, where you choose a block for each piece type. Scroll over a wedge to change its value without leaving the menu.
- Press Enter to place the shape, or choose Export in the radial menu to save a
.litematicfile. Backspace cancels.
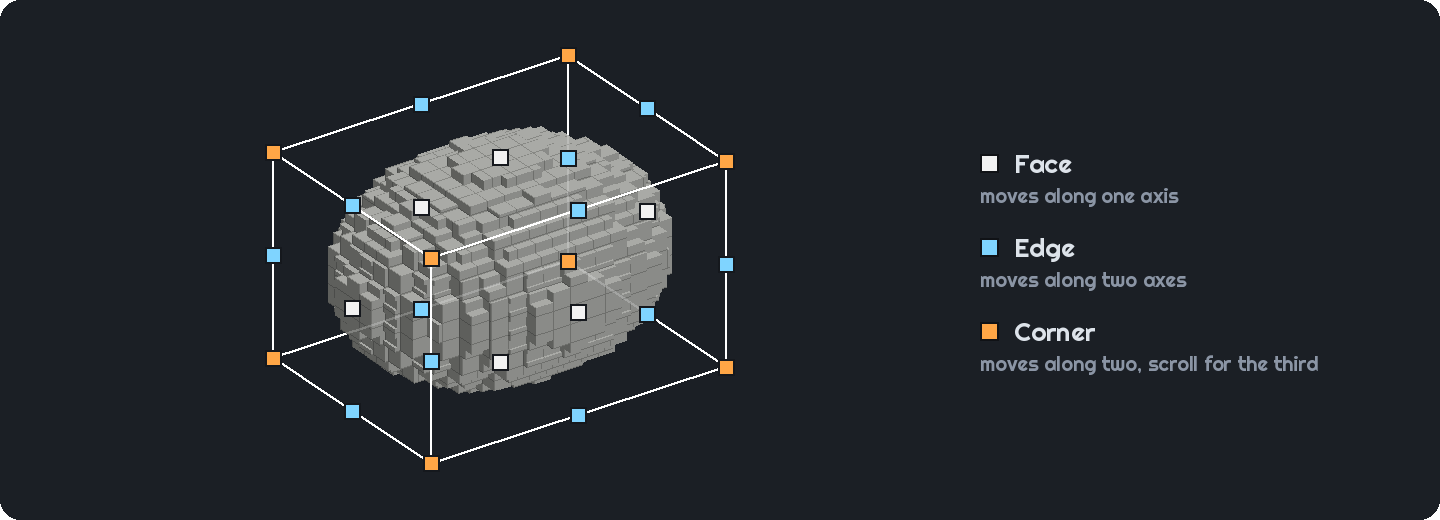
The hologram's box. A face handle moves along one axis, an edge handle along two, and a corner handle in the plane facing you, with scrolling for the third axis.
Editing in the world
- Bézier curves and surfaces have a handle on every control point. Drag one the same way as a box handle. Right-click removes a point and middle-click copies it. Insert adds a point where you look at the curve, and Delete removes the one you look at. On a surface these add and remove a whole row, or a column while you sneak.
- Hold a move or resize key instead of tapping it and a number box opens after 3 seconds. Type 10 to move exactly 10 blocks, or a negative number to go the other way.
- Z undoes the last drag, move or option change, and Y redoes it. With no hologram out, Z undoes the last placement and Y puts it back.
- K unlocks the hologram so it follows where you look, and locks it again.
- H turns Replace on or off, which decides whether the shape replaces blocks already there. J turns Carve on or off, which clears the space the shape encloses.
- Last shape in the radial menu brings back the hologram you last placed or cancelled, where it was.
The full menu
Press G for the full menu, with or without a hologram out. It has every setting for every shape, and a button that switches its tabs between 2D and 3D.
- Equations use Desmos-style syntax, like
y = 2sin(x),x^2 + y^2 = 16ory < 9 - x^2/4. A 3D equation can use x, y and z, likez = sin(x) cos(y)orx^2 + y^2 + z^2 < 9, where z is height. - The 2D preview shows the pieces on graph paper. The 3D preview shows the blocks from any side: drag to turn it, scroll to zoom, and drag a Bézier point to move it.
- On the Blocks tab, choose a block for each piece type, or use Match a colour… to pick blocks whose textures are closest to a colour.
- 2D shapes are built Upright like a wall or Flat like a floor, and can be several blocks deep.
- The Count tab shows how many of each block you'll need.
- Presets save a shape with its block choices.
- Place puts the shape in the world as a hologram. Export saves it as a
.litematicfile.

The pieces it chooses from: full block, slab, stair, trapdoor, shelf, fence, glass pane and wall.
Settings
The cogwheel in the full menu opens the settings. On Fabric they are also in Mod Menu, if you have it, and on NeoForge behind the Config button in the mod list. You can change:
- how long to hold a key before the number box opens, and before its progress bar shows
- whether the radial menu stays open while you hold its key, or opens and closes with a press
- whether the ring in the middle of the radial menu is stretched like the menu, with even slices, or round
- the order of the radial menu's wedges
- how big the handles are and how close you must look to grab one
- how solid the hologram looks, and how many blocks it shows before it falls back to an outline
- which way scrolling moves a handle you're dragging
- whether the key hints and the shape's size and block counts show on screen
Every key can be rebound under Options → Controls → Key Binds → Curve Generator. There are also six unbound keys that move the shape north, south, east, west, up and down.
Good to know
- Placing needs operator permissions, the same as
/setblock. In singleplayer, cheats must be on. Editing and exporting work anywhere. - The mod runs on the client. A server doesn't need it. If the server has it too, large builds place faster.
- It follows Minecraft's connection rules, so fences, panes, walls and stair corners join in the hologram the same way they join in the world.
- A 3D shape's box can be up to 256 blocks along each side. A shell that thickens outwards adds its thickness beyond that. A hologram of more than 30,000 blocks shows only its outline unless you raise the limit in the settings.
- Chains and end rods are there for thin lines. They start switched off; turn them on in the Blocks tab.
- Resource packs and modded blocks work. Colour matching reads the textures you have loaded. For 3D shapes it matches the side of each block, or the top if you choose that.
- Version 2.0 is for Minecraft 26.3. Earlier versions of the mod, without the in-world editor and 3D shapes, are available for older Minecraft versions.
The wiki covers Replace and Carve, presets, exporting, and how resource packs and modded blocks work.
Project description from CurseForge.
Pick your setup
Curvegen by Minecraft version and loader
Choose the version and loader you play, then open the matching release.
Minecraft version
26.2
2 loader buildsMinecraft version
26.1.2
2 loader buildsMinecraft version
26.1.1
2 loader buildsMinecraft version
26.1
2 loader buildsMinecraft version
1.21.11
1 loader buildMinecraft version
1.21.10
1 loader buildMinecraft version
1.21.9
1 loader buildMinecraft version
1.21.8
1 loader buildMinecraft version
1.21.7
1 loader buildMinecraft version
1.21.6
1 loader buildMinecraft version
1.21.5
1 loader buildShowing the newest 12 of 17 game versions. Older files are in the list below.
Check the dependencies, then try the file in a copied instance before changing a world you care about.
Recent files
Curvegen versions and loaders
Curve Generator 2.0.0+mc26.3-neoforge
curvegen-neoforge-2.0.0.jar
8 Oct 2026
Client Source doesn’t say Server Source doesn’t say Dependencies No extras listed Listed on Release listing
Check the 26.3 · NeoForge setup NeoForge26.3 release
Curve Generator 2.0.0+mc26.3-fabric
curvegen-fabric-2.0.0.jar
8 Oct 2026
Client Source doesn’t say Server Source doesn’t say Dependencies 1 required · 1 unchecked Listed on Release listing
Check the 26.3 · Fabric setup Fabric26.3 release
Curve Generator 1.3.1+mc26.3-fabric
curvegen-fabric-1.3.1.jar
6 Oct 2026
Client Source doesn’t say Server Source doesn’t say Dependencies 1 required · 1 unchecked Listed on Release listing
Check the 26.3 · Fabric setup Fabric26.3 release
Curve Generator 1.3.1+mc26.3-neoforge
curvegen-neoforge-1.3.1.jar
6 Oct 2026
Client Source doesn’t say Server Source doesn’t say Dependencies No extras listed Listed on Release listing
Check the 26.3 · NeoForge setup NeoForge26.3 release
Curve Generator 1.3.0+mc26.3-neoforge
curvegen-neoforge-1.3.0.jar
5 Oct 2026
Client Source doesn’t say Server Source doesn’t say Dependencies No extras listed Listed on Release listing
Check the 26.3 · NeoForge setup NeoForge26.3 release
Curve Generator 1.3.0+mc26.3-fabric
curvegen-fabric-1.3.0.jar
5 Oct 2026
Client Source doesn’t say Server Source doesn’t say Dependencies 1 required · 1 unchecked Listed on Release listing
Check the 26.3 · Fabric setup Fabric26.3 release
Curve Generator 1.3.0+mc26.2-fabric
curvegen-fabric-1.3.0.jar
5 Oct 2026
Client Source doesn’t say Server Source doesn’t say Dependencies 1 required · 1 unchecked Listed on Release listing
Check the 26.2 · Fabric setup Fabric26.2 release
Curve Generator 1.3.0+mc26.2-neoforge
curvegen-neoforge-1.3.0.jar
5 Oct 2026
Client Source doesn’t say Server Source doesn’t say Dependencies No extras listed Listed on Release listing
Check the 26.2 · NeoForge setup NeoForge26.2 release
Curve Generator 1.2.0+mc26.3-neoforge
curvegen-neoforge-1.2.0.jar
4 Oct 2026
Client Source doesn’t say Server Source doesn’t say Dependencies No extras listed Listed on Release listing
Check the 26.3 · NeoForge setup NeoForge26.3 release
Curve Generator 1.2.0+mc26.3-fabric
curvegen-fabric-1.2.0.jar
4 Oct 2026
Client Source doesn’t say Server Source doesn’t say Dependencies 1 required · 1 unchecked Listed on Release listing
Check the 26.3 · Fabric setup Fabric26.3 release
Curve Generator 1.2.0+mc26.2-fabric
curvegen-fabric-1.2.0.jar
4 Oct 2026
Client Source doesn’t say Server Source doesn’t say Dependencies 1 required · 1 unchecked Listed on Release listing
Check the 26.2 · Fabric setup Fabric26.2 release
Curve Generator 1.2.0+mc26.2-neoforge
curvegen-neoforge-1.2.0.jar
4 Oct 2026
Client Source doesn’t say Server Source doesn’t say Dependencies No extras listed Listed on Release listing
Check the 26.2 · NeoForge setup NeoForge26.2 release
Looking for an older file? The official CurseForge project page is in Resources.
 mod
mod CurseForge · Minecraft
More Curious Slots — Unofficial Fabric Port
Unofficial Fabric port of More Curios Slots for Minecraft, adapted for Accessories mod.
 mod
mod CurseForge · Minecraft
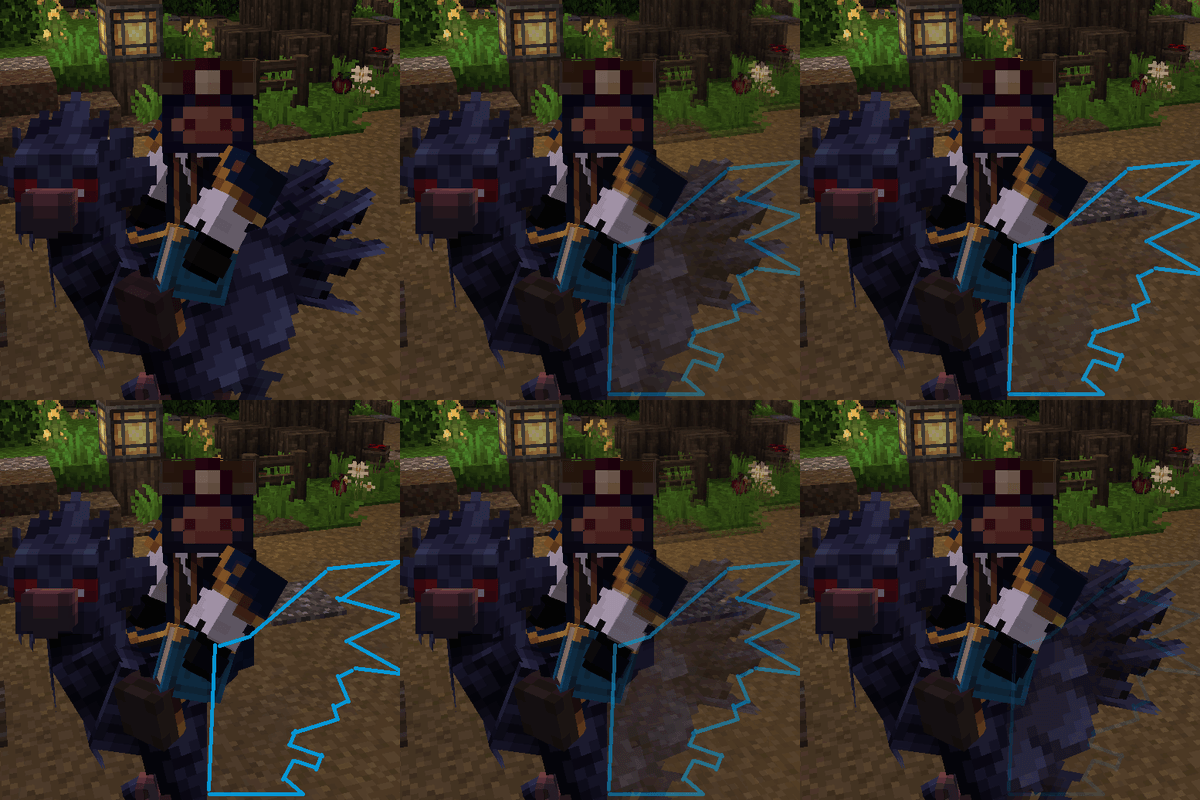
Hide Models
Client-side mod hides model pieces from rendering
 mod
mod CurseForge · Minecraft
Aetherflame
An altar-like warding torch that blocks hostile spawns and keeps hostile mobs away within adjustable ranges of 25, 50, 75, or 100 blocks.