5555ff-lib Needed by Call Your Cat v2.2.0.0+mod
requiredMatching file found Matched file: v1.3.2+mod

Modrinth · Minecraft mod
Easily call (whistle) your cat with a goat horn to teleport it to you
Quick answer
Call Your Cat v2.2.0.0+mod targets 26.3 with Fabric, Forge, NeoForge. Installation on the client is optional. Installation on the dedicated server is optional. All 1 required mods have matching files.
Where it goes
Installation on the client is optional. Installation on the dedicated server is optional.
The source marks this as usable on both the client and server.
v2.2.0.0+mod. Change the file and its required mods may change too.
Install 5555ff-lib first. We found matching files for this game-version and loader setup.
We only count dependency files that match this setup. A file for another loader does not fill the gap.
Before you install it
Built for Call Your Cat v2.2.0.0+mod. Pick another file and the loader, install side or required mods may change.
Use v2.2.0.0+mod. It targets 26.3 with Fabric, Forge, NeoForge; another release may have different loader, side or dependency requirements.
Install 5555ff-lib first. We found matching files for this game-version and loader setup.
Installation on the client is optional. Installation on the dedicated server is optional.
Use the “Get this file” button beside v2.2.0.0+mod. It opens that exact file at the source.
About this project


The cat can be anywhere, it always works to teleport it to you, even in unloaded chunks
There's currently a bug, where if the cat you want to call is too far away it will be invisible after the teleport
--> to fix that you have to rejoin the game
1. Tame a cat
2. Give the cat any name (it can not include special characters like # or ')
3. Hold any goat horn you want in your hand
4. Sneak and look at the cat for 4 seconds
4. You will then get a horn that looks enchanted and has the name of the cat
5. Whenever you use the horn, it will teleport to you
--> Only the owner of the cat can get the goat horn + use the goat horn to call the cat

If something doesn't work, feel free to join the discord server
Open Minecraft
Launch the game.
Create a New World
Navigate to "More" and click on "Data Packs".
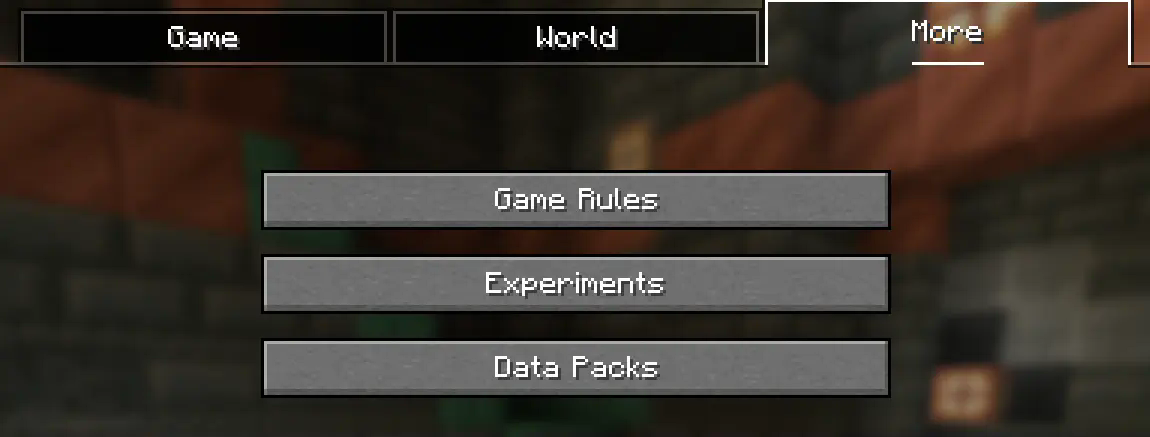
Add the Datapack
Drag the datapack (a .zip file or directory) into the Minecraft window.
Activate the Datapack
Move the datapack to the right-hand side of the screen by clicking the triangle on its icon (visible when hovering over it).
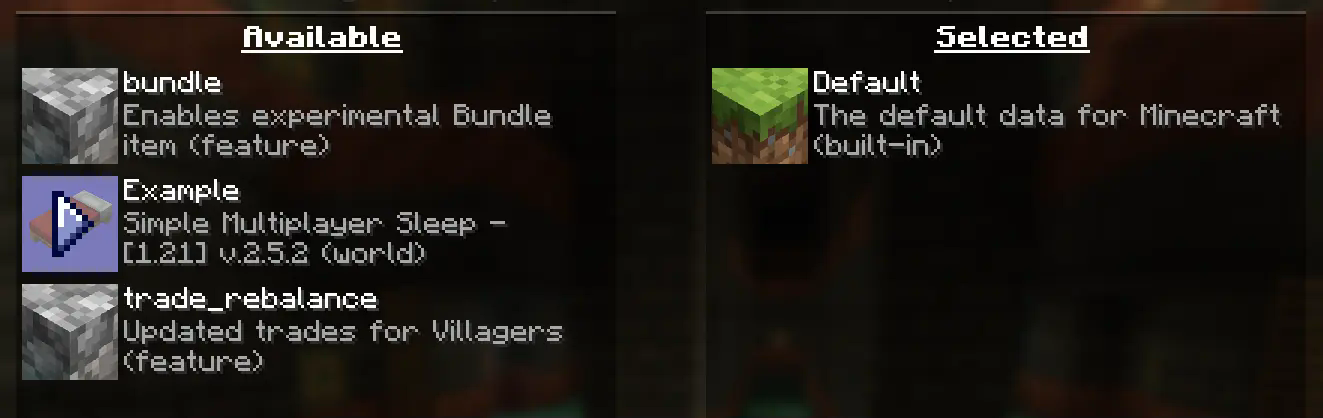
The datapack only works if cheats are enabled.
You can verify the datapack is active by typing:/datapack list enabled
This command should list an entry named [file/<your datapack file/directory name>].
Open Minecraft
Launch the game.
Select Your World
Add the Datapack
datapacks..zip file or a directory.Reload the World
/reload in the chat or press F3 + T to reload resources.The datapack only works if cheats are enabled.
You can verify the datapack is active by typing:/datapack list enabled
If you encounter this issue, here is a step by step guide on how to enable Cheats/Admincommands permanently after you have already created a Minecraft world.
⚠️ Before you begin, you should save and backup your world in case something goes wrong.
(I will not take any responsibility for any corrupt worlds. Do this at your own risk!)
But don't worry this works without any problems.
If you don't want to change this permanently check out this guide.
NBTExplorer is an open-source NBT editor for all common sources of NBT data. It's mainly intended for editing Minecraft game data.

<Your Minecraft World>level.datDataallowCommands

0 to 1 and click "OK"

That's it. You are done. You can now join your world and check if you have permission to change your gamemode, for example.
If you encounter this issue, here is a step-by-step guide on how to enable Cheats/Admin commands temporarily after you have already created a Minecraft world.
Join Your World
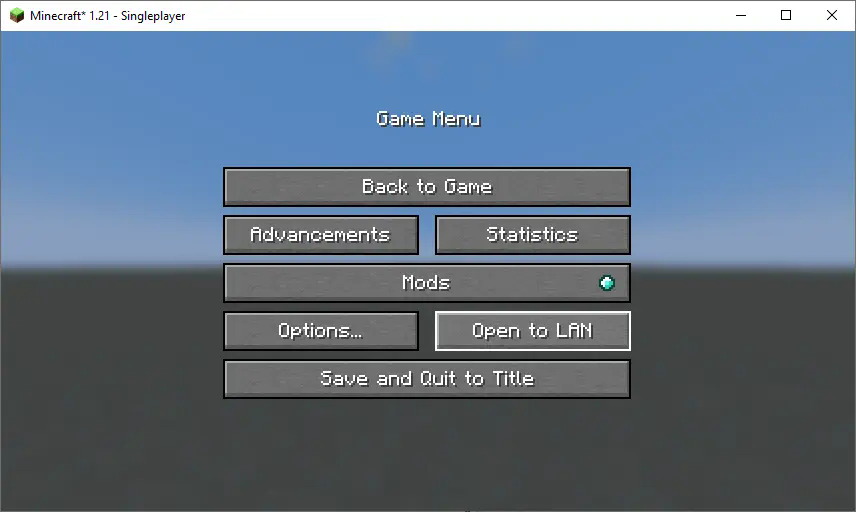
Open your single-player world and press "Escape".
Open to LAN
Click on "Open to LAN".
Allow Commands
Set "Allow Commands" to ON.
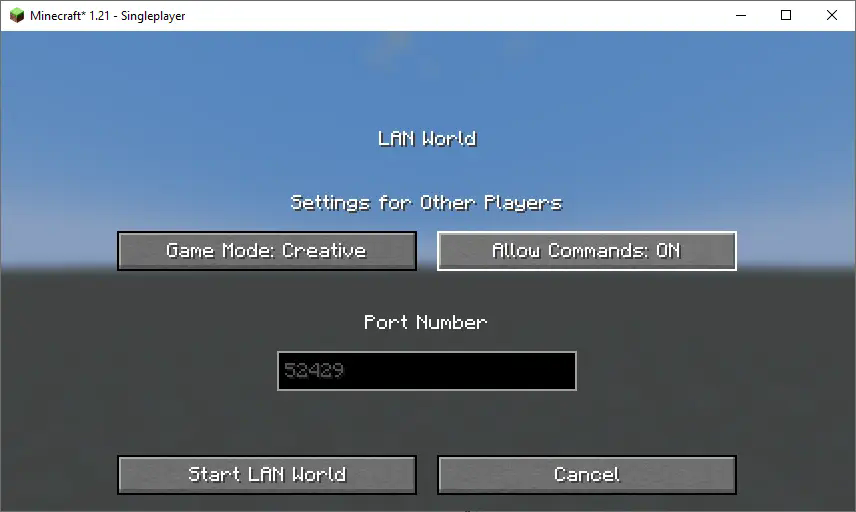
Start LAN World
Click "Start LAN World" to apply the changes.
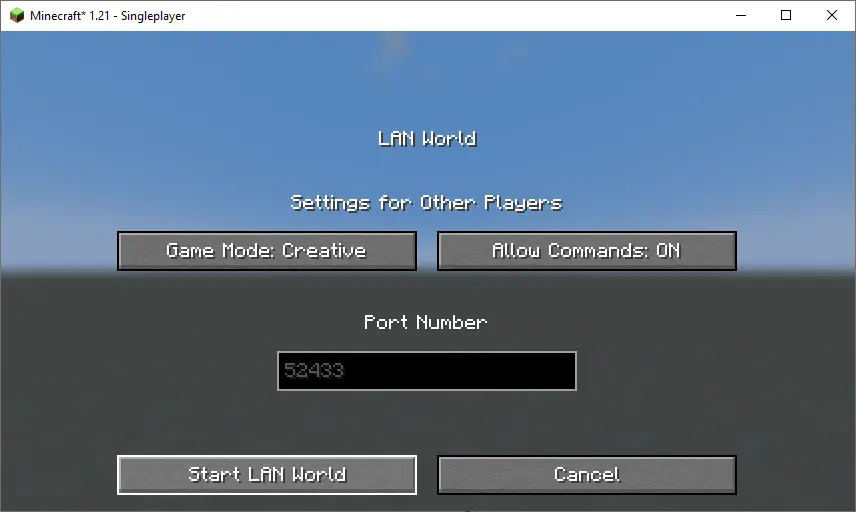
Now, you should be able to use commands like changing your gamemode. Keep in mind that this is only temporary and will need to be done every time you join the world.
Open Your Server Folder
Navigate to your server folder, then open the folder for the world you wish to install the datapack in (default: world).
Add the Datapack
.zip file.datapacks inside the world folder.Reload the Server
/reload from the console or as a level 3 operator if the server was running during the installation.Run the Uninstall Command
For my datapacks, run the command:/function datapack_name:uninstall
Delete the Datapack
/datapack disable [file/your data pack file/directory name]Reload the World or Server
After deleting or disabling the datapack, run:
/reload
Download the Mod
.jar file.Ensure No Datapacks or Other Mods Conflict
Locate the Mods Folder
mods.mods folder doesn't exist, create one.Install the Mod
.jar file for the Mod into the mods folder.Restart the Server
mods folder, restart your Minecraft server for the mod to be activated.Verify Mod Installation
/mods or a similar command (depending on the mod) to see if the Mod has been successfully loaded.Project description from Modrinth.
Pick your setup
Choose the version and loader you play, then open the matching release.
Showing the newest 12 of 17 game versions. Older files are in the list below.
Check the dependencies, then try the file in a copied instance before changing a world you care about.
Recent files
call-your-cat-v2.2.0.0.jar
28 Sept 2026
call-your-cat-v2.2.0.0.zip
28 Sept 2026
call-your-cat-v2.2.0.jar
23 Sept 2026
call-your-cat-v2.2.0.zip
23 Sept 2026
call-your-cat-v2.1.0.jar
17 Jun 2026
Call-Your-Cat-v2.1.0.zip
17 Jun 2026
call-your-cat-v2.0.0.jar
23 Apr 2026
Call-Your-Cat-v2.0.0.zip
23 Apr 2026
call-your-cat-v1.4.1.jar
20 Apr 2026
call-your-cat-v1.4.1.zip
20 Apr 2026
call-your-cat-v1.4.1.jar
11 Apr 2026
call-your-cat-v1.4.1.zip
10 Apr 2026
Looking for an older file? The official Modrinth project page is in Resources.
 mod
modA utility mod that allows painting onto the textures of entities. Supports layering, ETF, EMF, Geckolib, and Sodium.
 mod
modAdds completely client-sided pets to your game. Supports every vanilla mob, some custom ones, and will work on any server, including in singleplayer!
 mod
modPokemobs for Minecraft!